Dottie Angel Frock, Part 1: WHAT SIZE?

Screen Shot 2015-10-01 at 11.59.57 AM

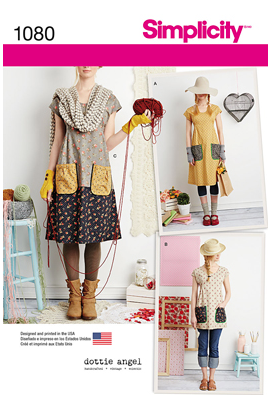
You read it here first: Simplicity Pattern 1080, The Dottie Angel Frock (DAF for short), released earlier in 2015, is fast becoming a cult classic in the world of crafts and sewing. This is a pattern that will live for decades, and will one day be out of print, collectible, and highly valued on the resale market. Trust me. In otherwords, run, do not walk to your local fabric emporium and grab at LEAST one copy. Note, you are going to fall in love with and want to make a wardrobe full of these frocks and for that reason you might want to pick up a second copy or trace your first. No local shops? Visit the Simplicity site. BTW, the pattern makes 3 versions… my posts will be about version C, the most complex and delicious in my opinion.

Screen Shot 2015-10-01 at 12.00.16 PM

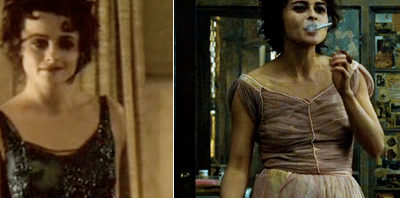
Let me get this out of the way: I am a NOVICE sewing person. Making this dress was my first attempt at a commercial pattern from any of the Big 4 (Simplicity, McCalls, Burda, Vogue). I have been “sewing” for many years, but in the most punk-rock ad-hoc way imaginable. I did not know how to lay out, mark, or cut a pattern, let alone read and follow the often-obtuse instructions. I thrift, reconstruct, make stuff up as I go along. Some things turn out wearable, and that has been due to the fact that I have a great sense of style and design and color and can fake my way through by playing to my strengths and ignoring my weaknesses (pretty much everything to do with actual sewing). Pictured below is a 4-piece dress I had a lot of fun with years ago, the Piece of Cake Dress. It is a super sweet indie pattern available here, and quite simple. I made at least 5 of them. Good practice sewing, but did not prepare me for a commercial pattern attempt. It did give me some bias binding experience, more on that later. And yes, that’s me with supah short hair.

jodicake5

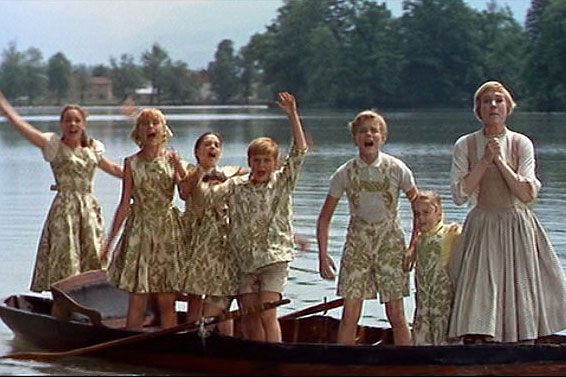
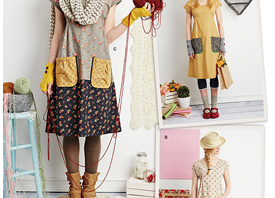
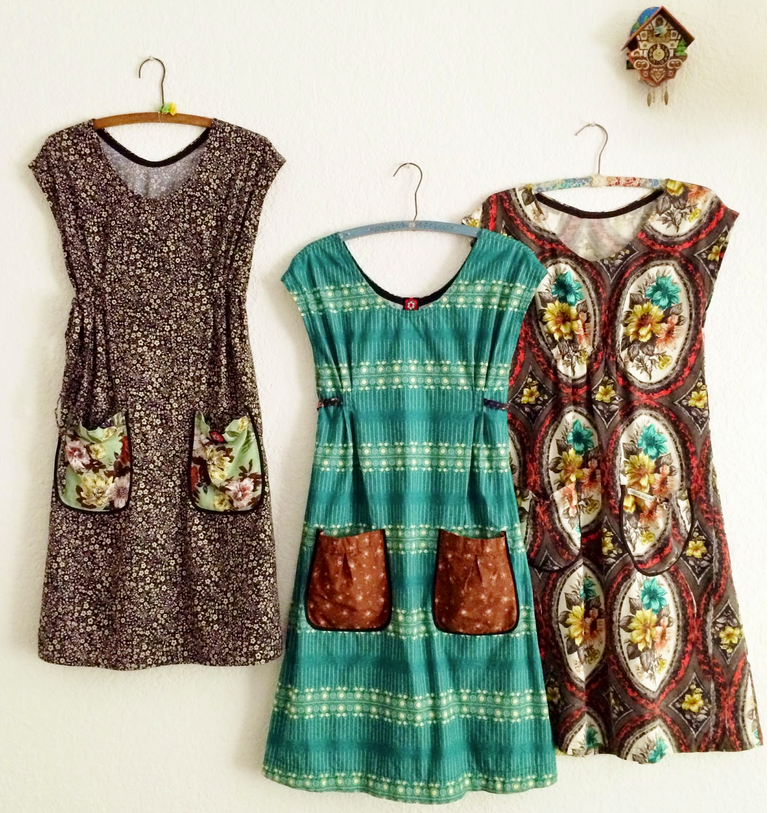
So, with its scant handful of pattern pieces (6 for version C), and finished results TO DIE FOR, this pattern finally inspired me to suck up all my fears and learn how to sew by the rules. I can’t be the only one. And, that’s why I’m here writing. If you want to read the musings of MUCH more experienced sewists about the DAF (and I recommend that you do even if for now you have no idea WTF they are talking about), just google and you’ll find those blog posts/pattern reviews. This is not a review. My review of this pattern is (pardonnez moi): fucking brilliant. Yes, there will be a few caveats, and this is about my experience getting through some complexities. But look at the pattern designer’s creations pictured below. I mean, just LOOK at those dresses! You know you want one. You will find out that you want 6. Or perhaps a baker’s dozen.

Screen Shot 2015-10-01 at 12.16.04 PM

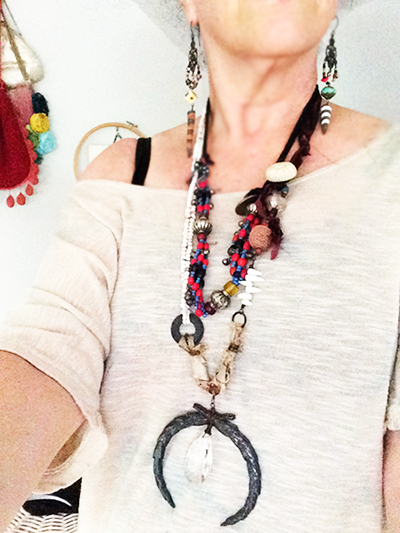
Briefest backstory. Dottie Angel is the crafty granny-chic alter-ego of blogger, Tif Fussell. She is, in a word, also brilliant. In a few more words, she is an adorable petite-looking powerhouse of creativity and technique… she thrifts and collects and curates… she sews, knits, embroiders, makes gorgeous photos, publishes books… she blogged for many years, is raising a bunch of kids, and seems to be the sort of dear lovely person you want as a best friend, mentor, sister. Yes, she’s all that. And she makes it look completely effortless. Which, of course, it–whatever it is–is not.

IMG_4409

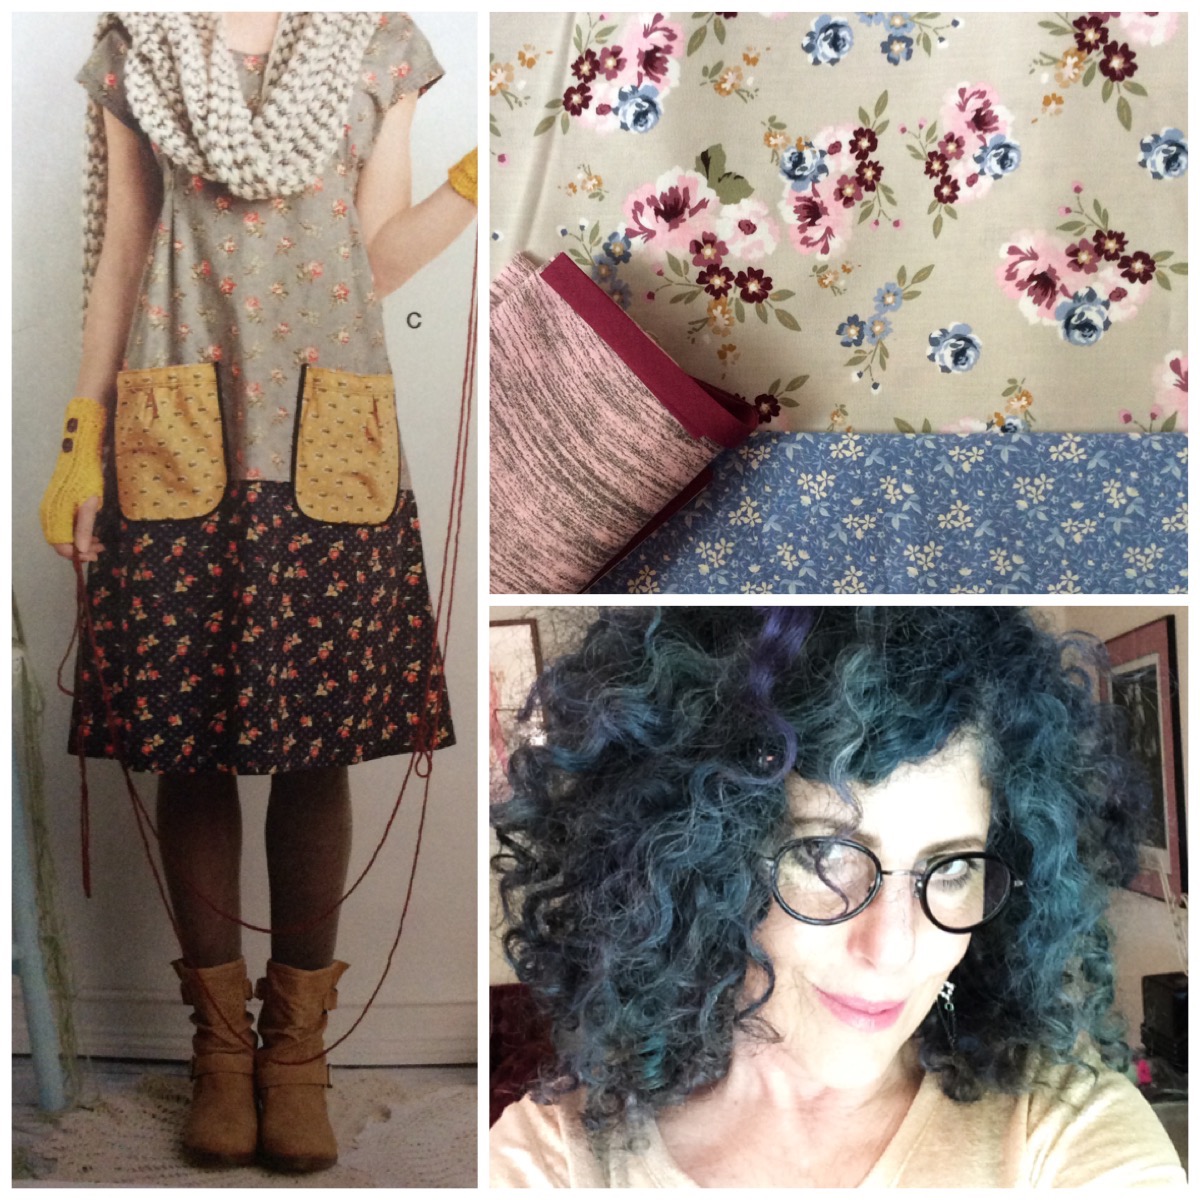
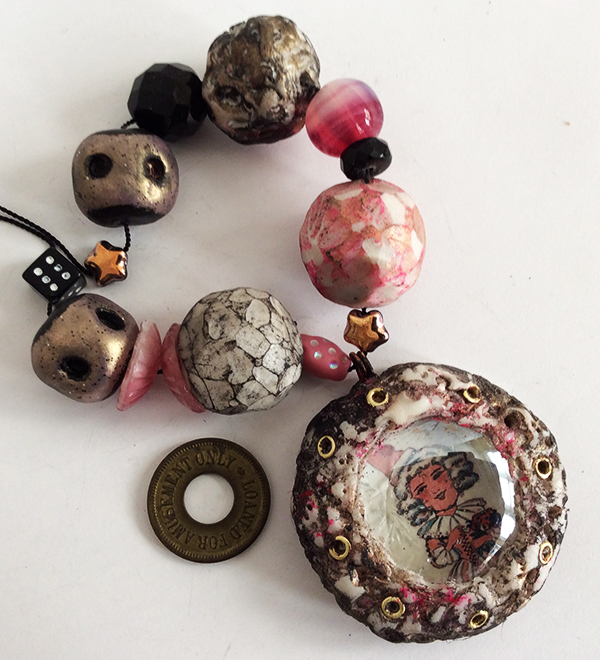
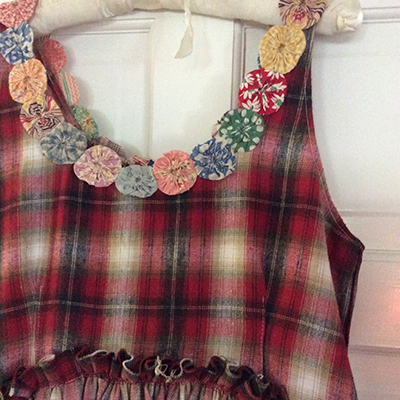
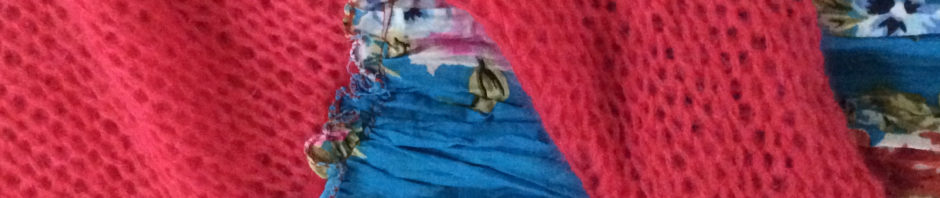
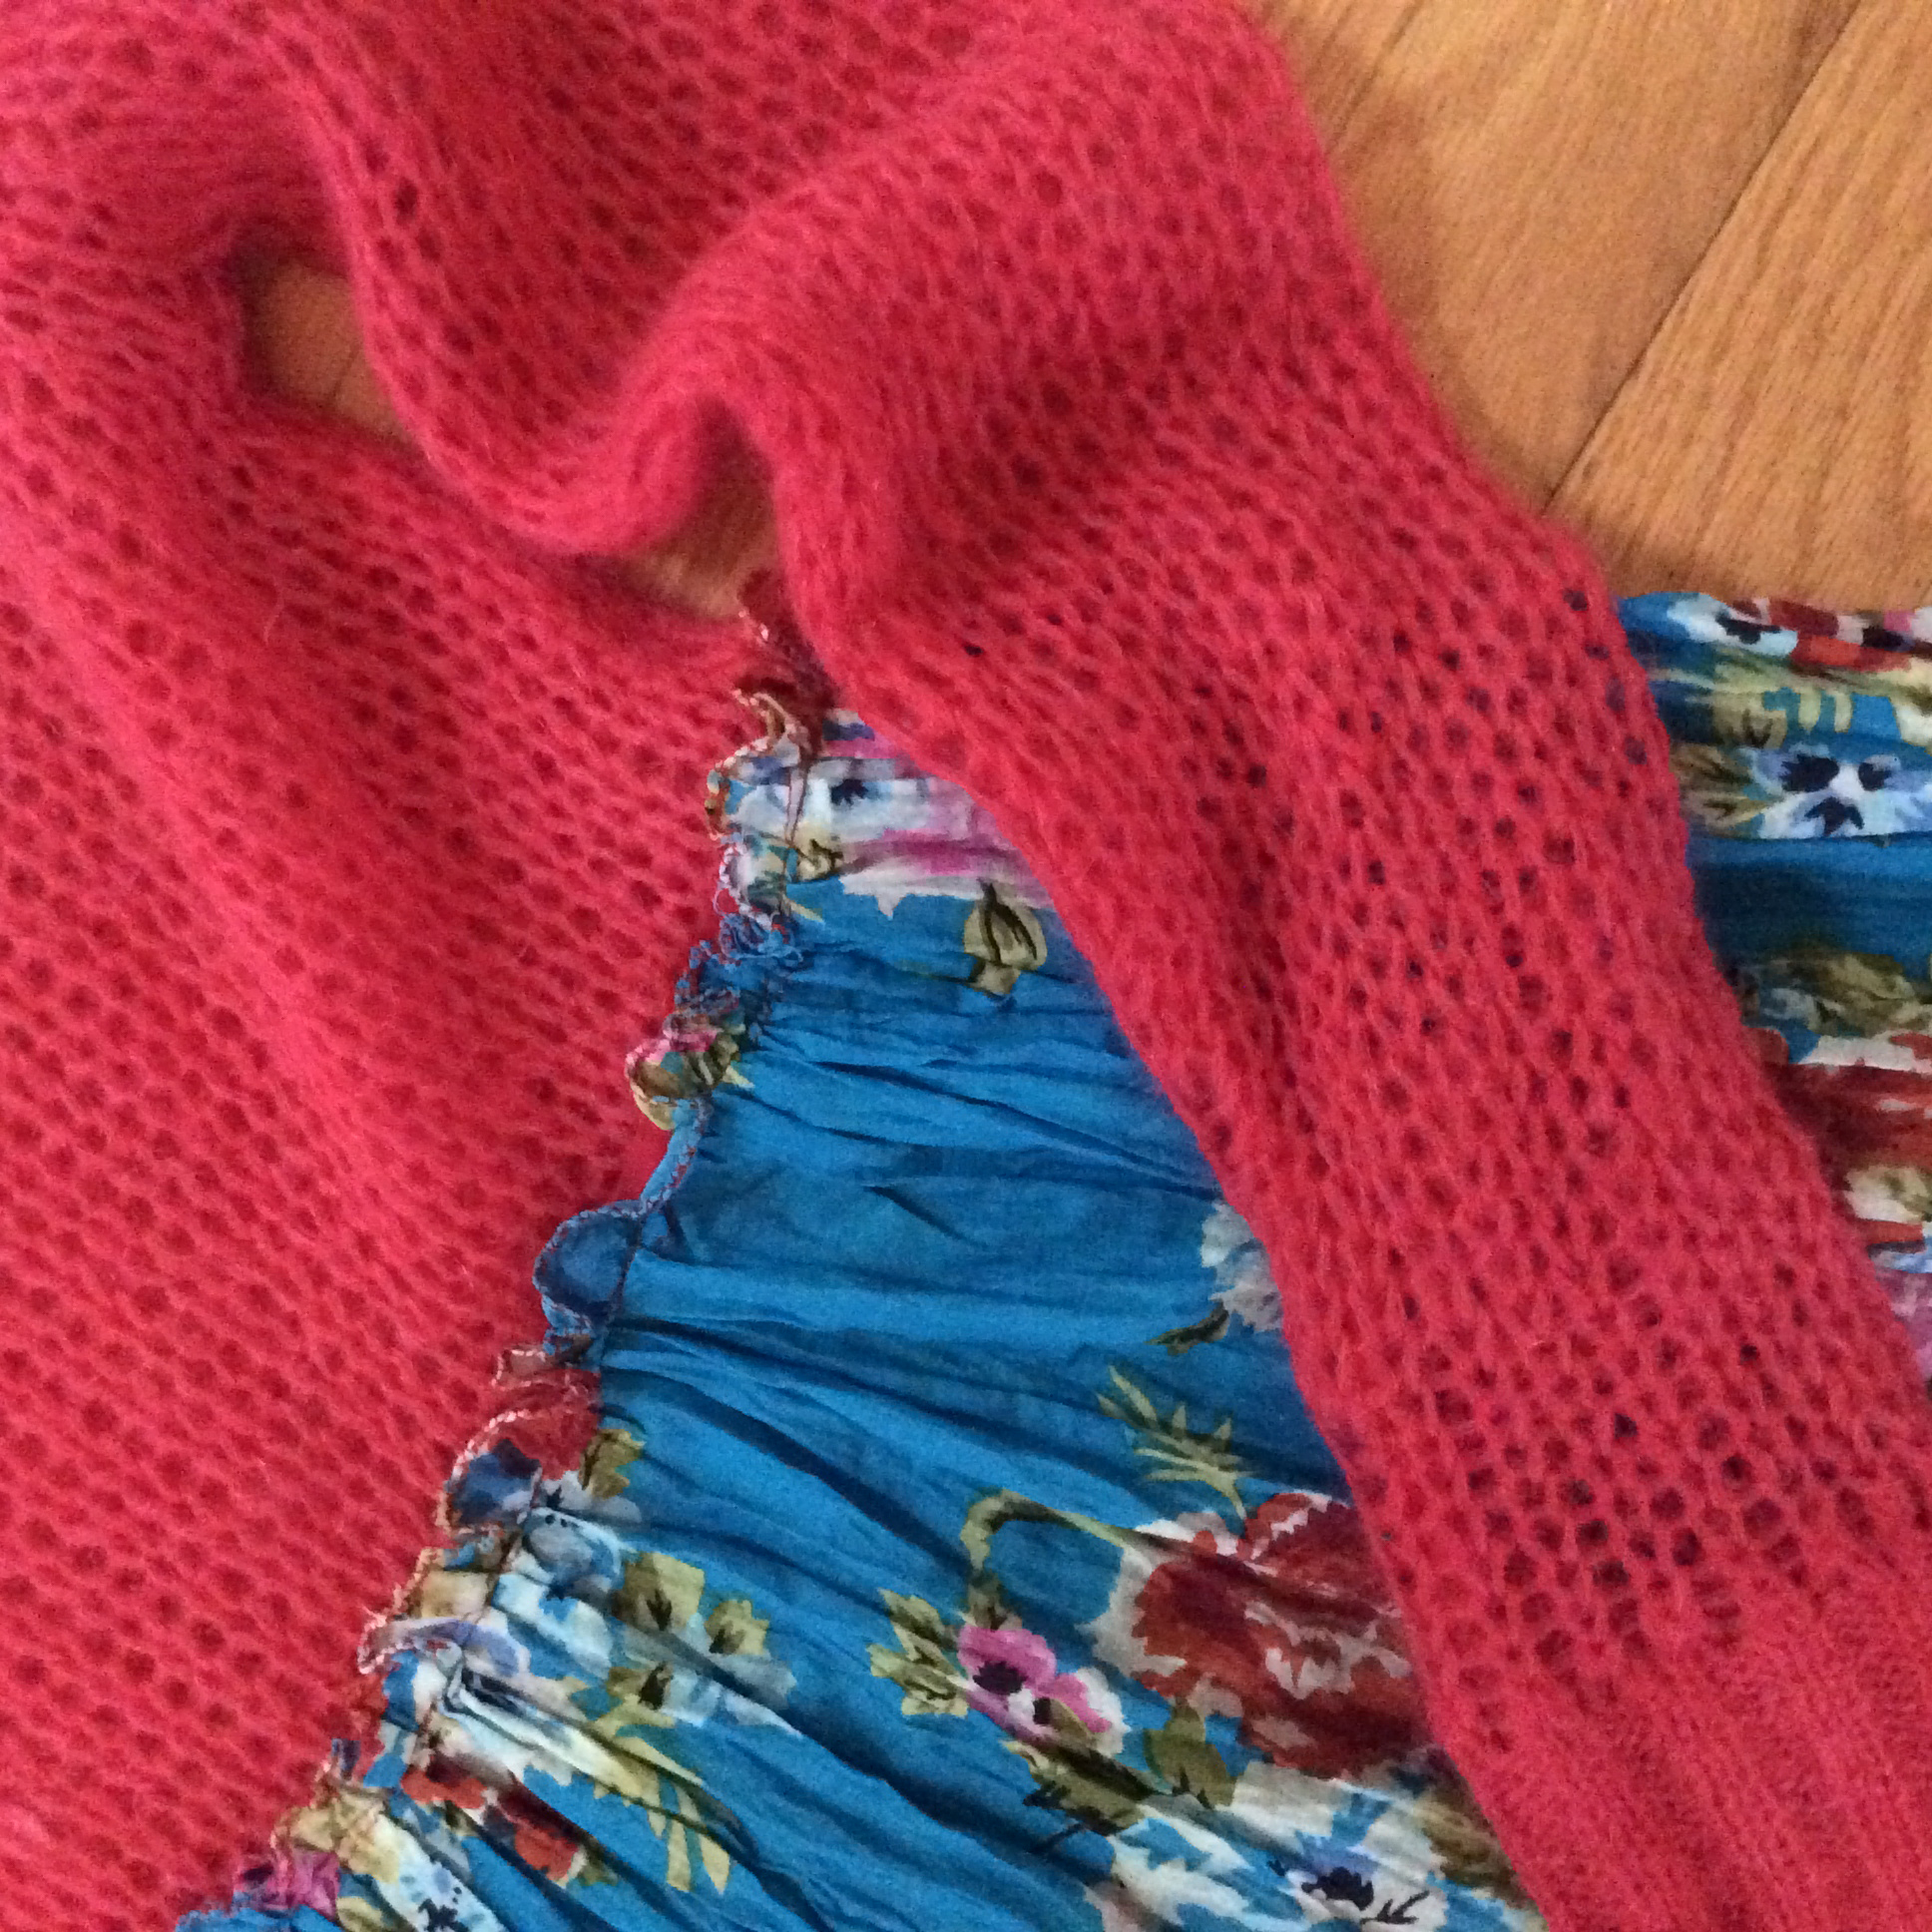
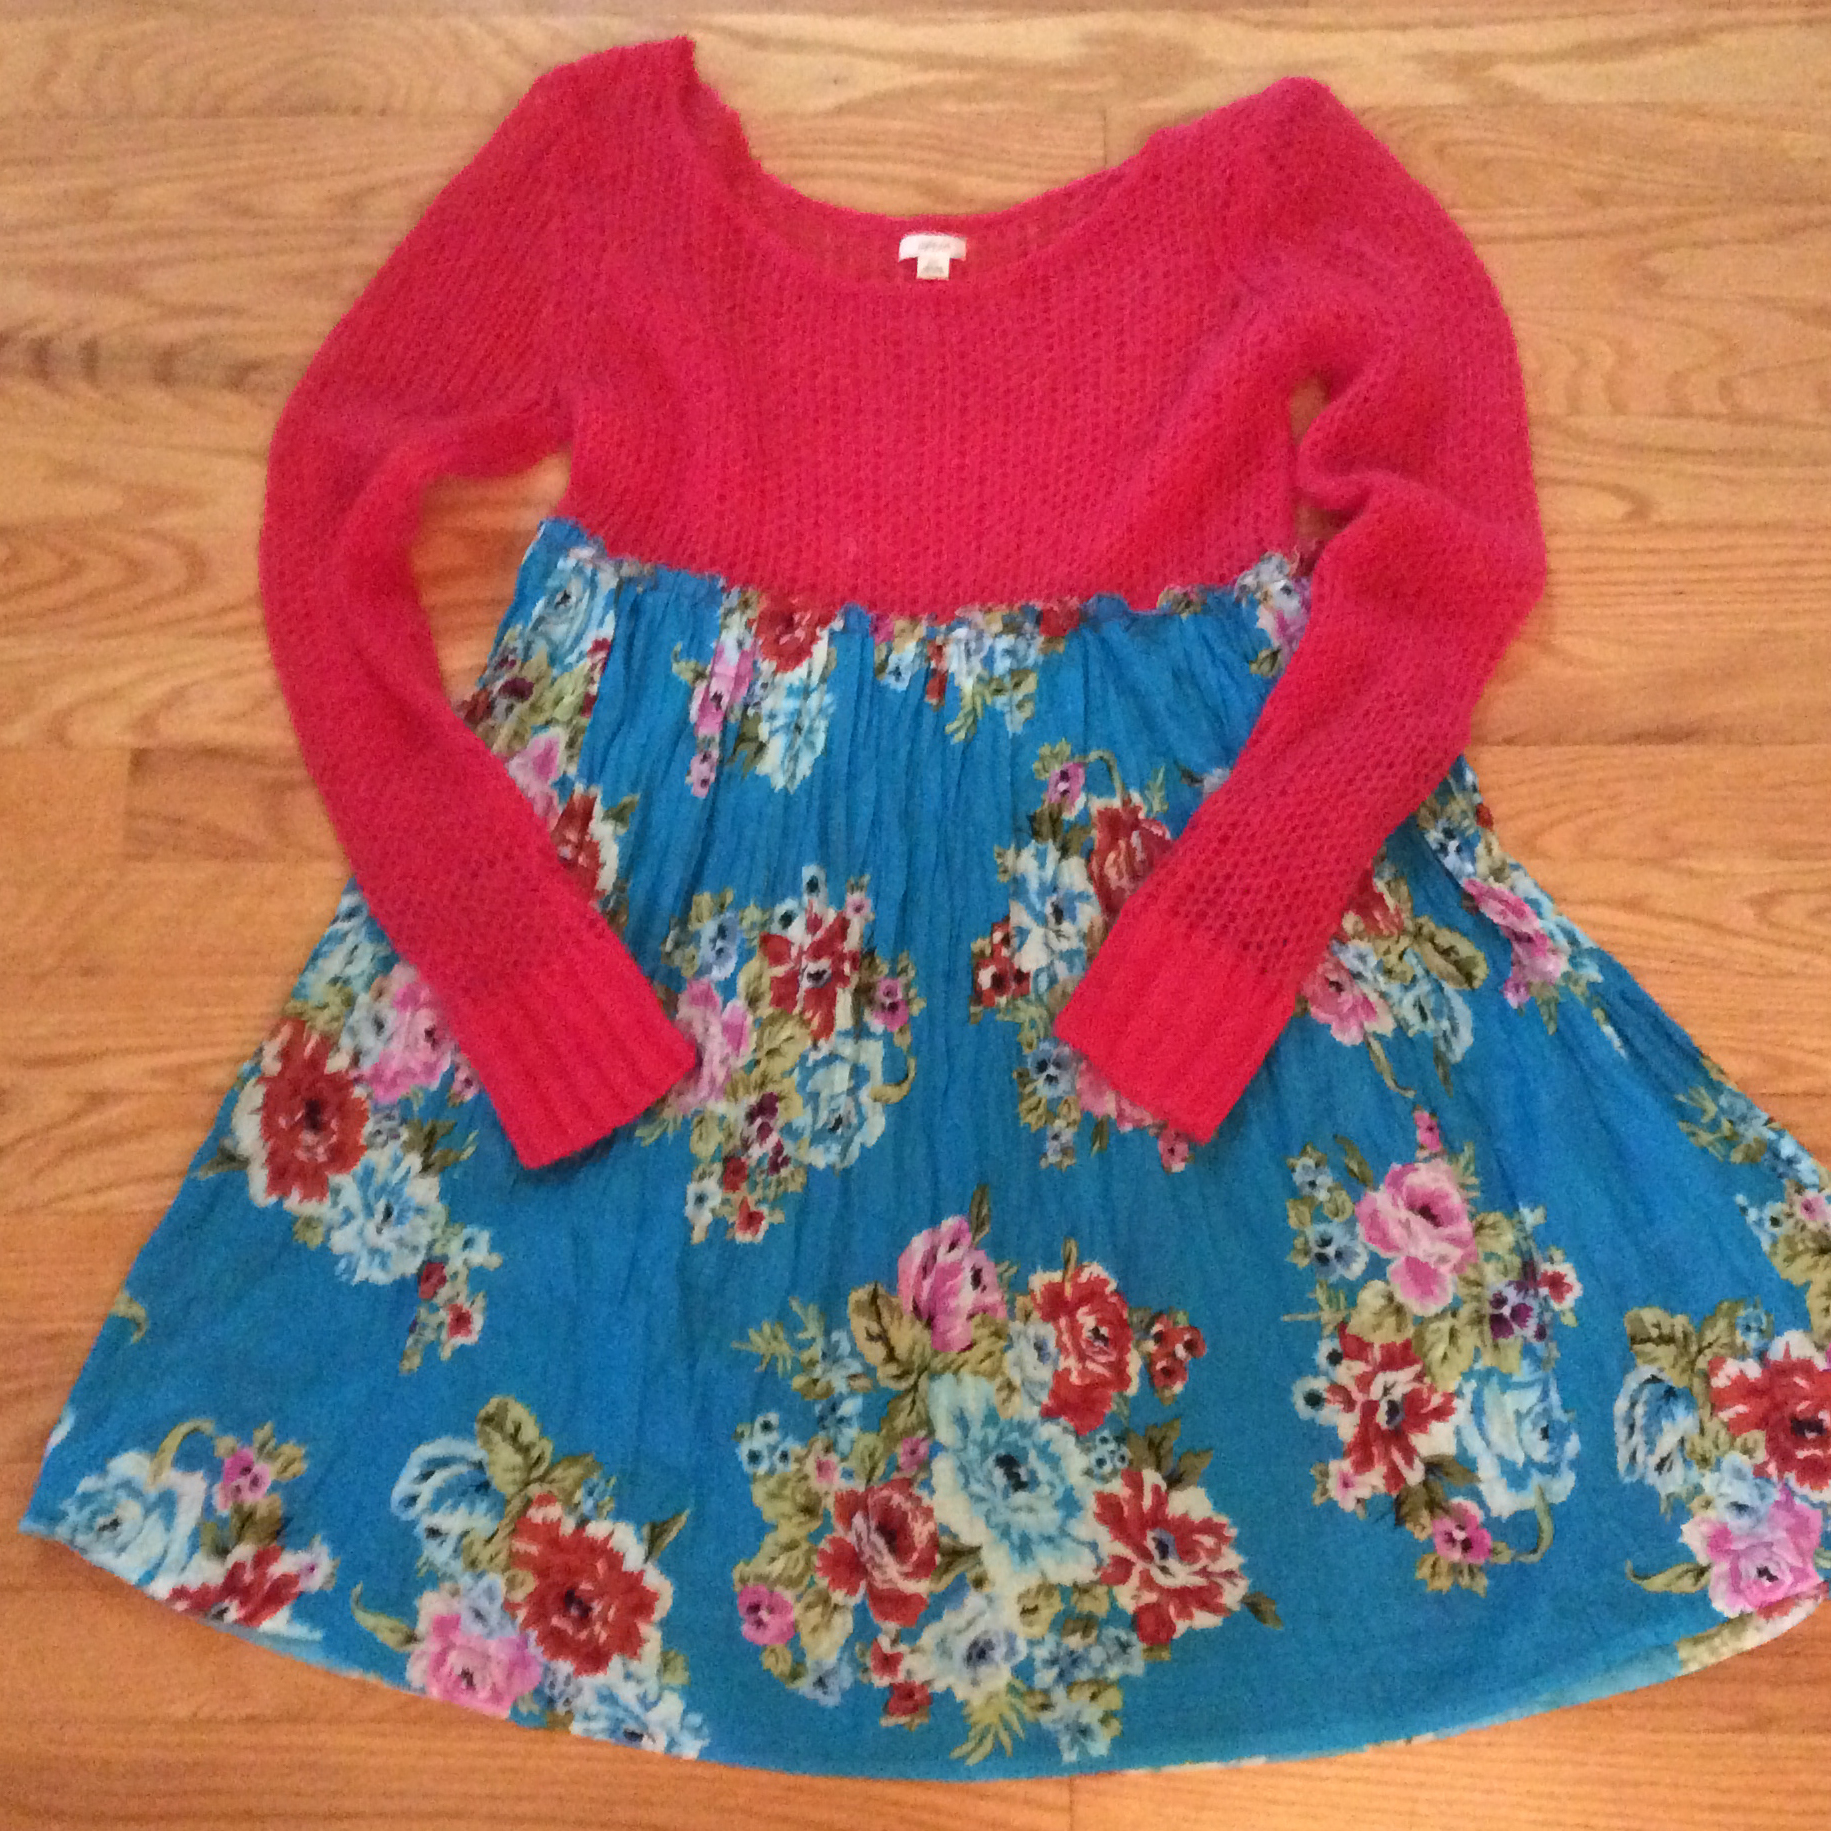
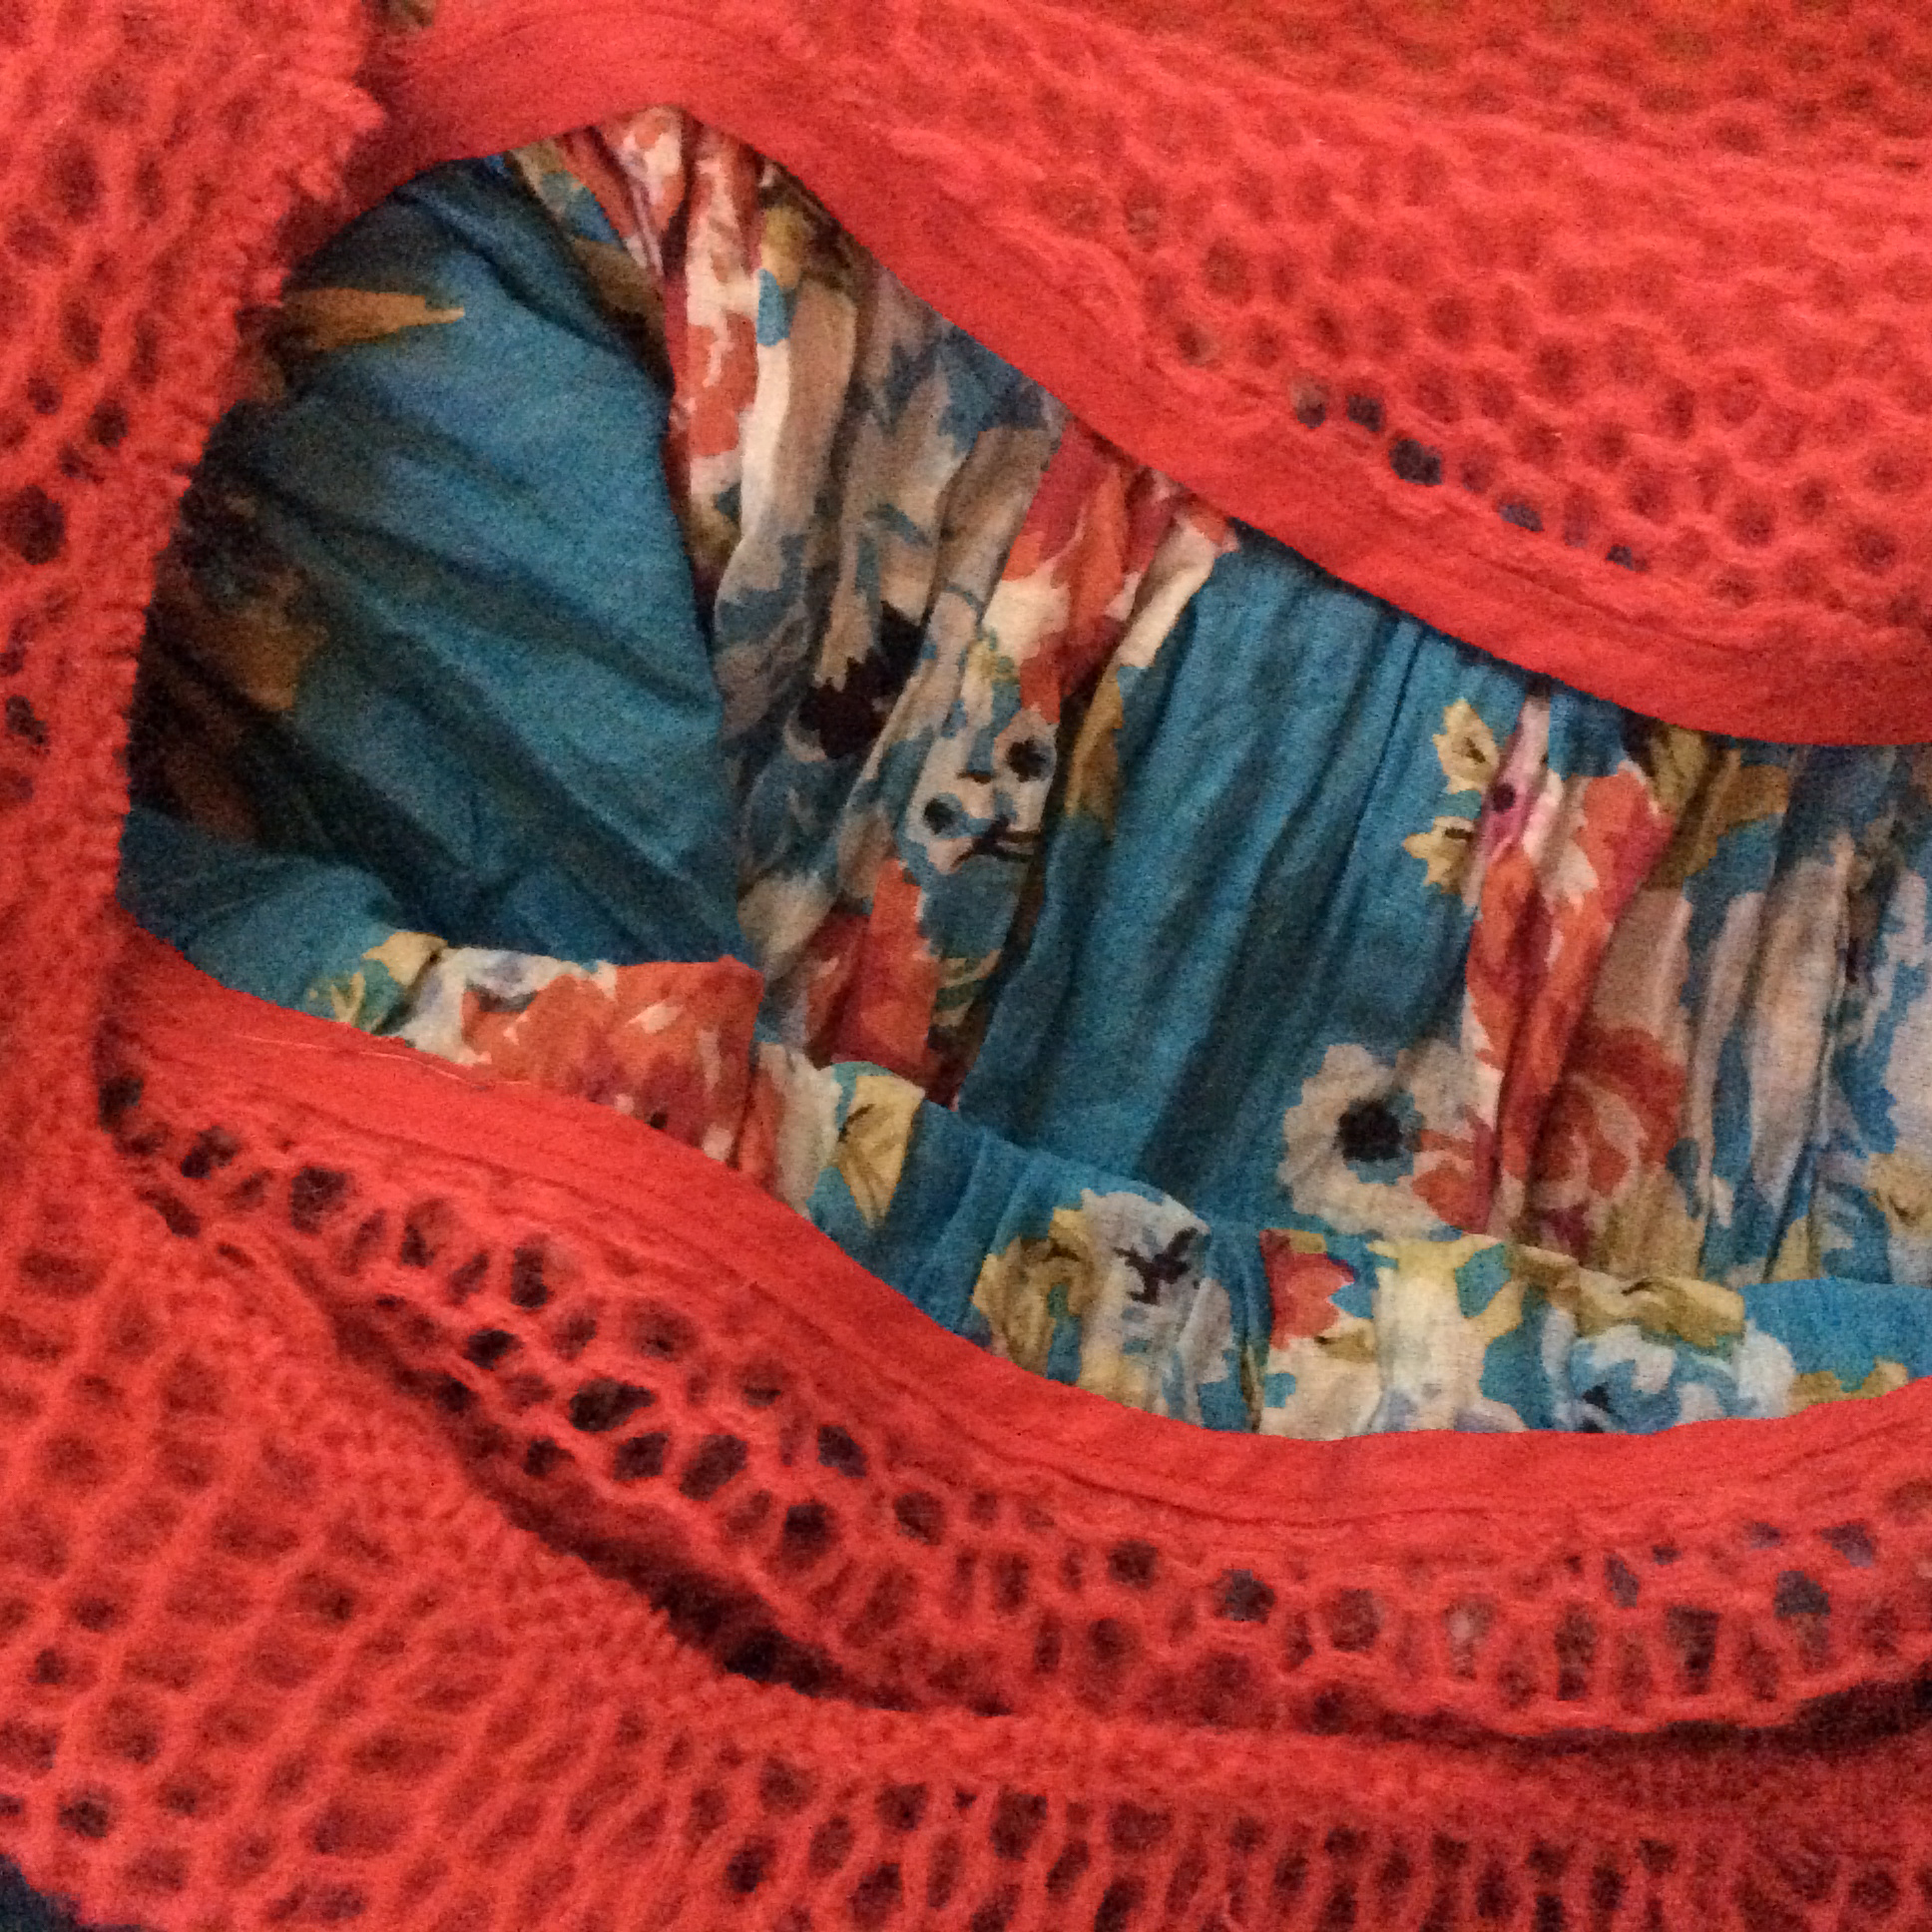
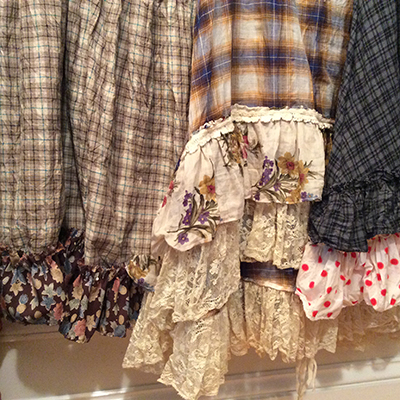
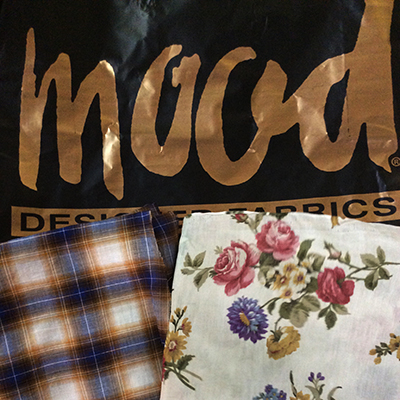
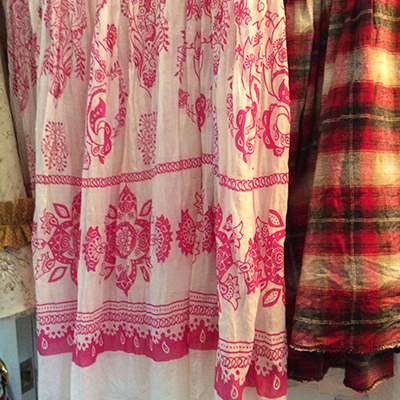
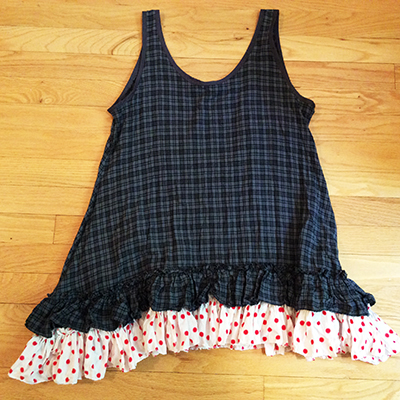
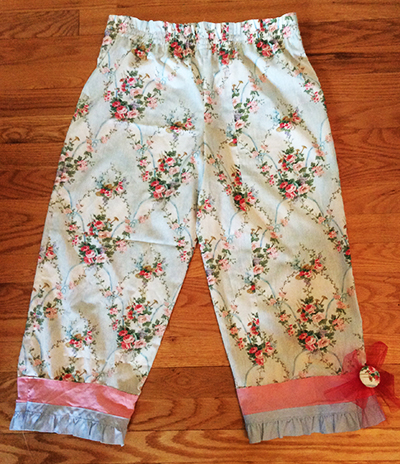
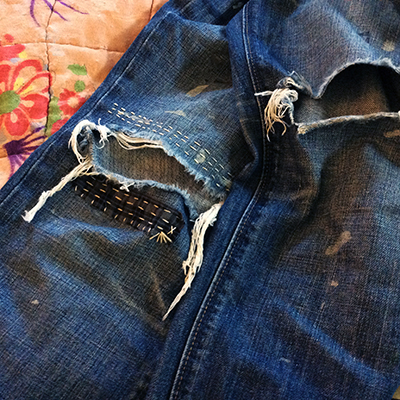
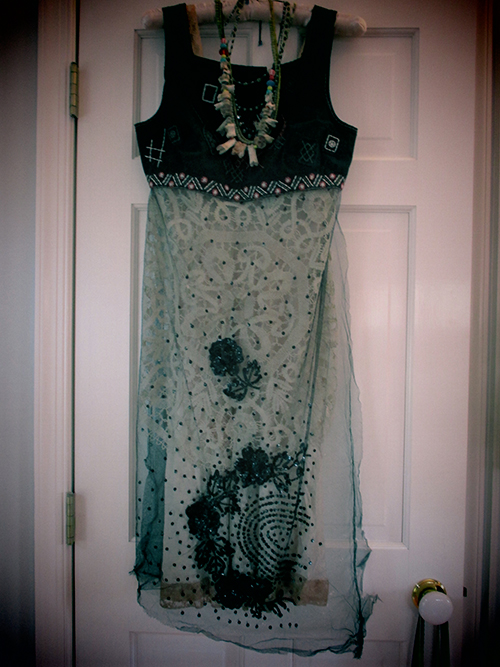
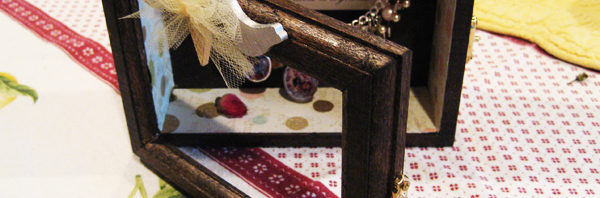
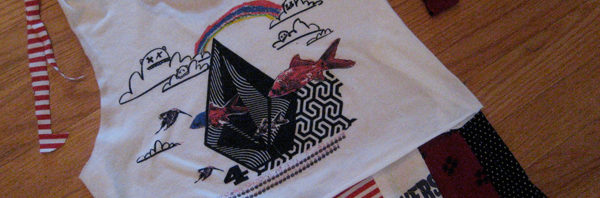
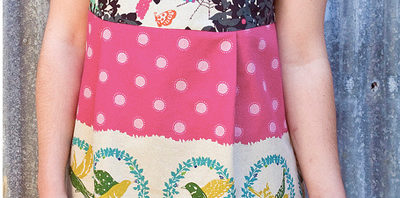
And that brings us back to this dress pattern (me and my little textile study for DAF #1, pictured above). Now, I have bought patterns before, opened up the folded moth’s-wing-thin tissues and instructions that appear written in a language I do not speak, and ended up in puddle of frustrated tears at the mere thought of getting started. Sewing from patterns is… a thing. So–and you may not like this–my recommendation to you: Learn how to use your machine a bit, then take a good basic class on working with patterns. I honestly don’t think you can learn the basics without SEEING them demonstrated (online courses are becoming big, I have my doubts, at least for me). I booked private sessions ($45 per hr, reasonable as these things go) with Jen Biehl at Bits of Thread Studio here in DC, working with her on two successive weekends for 1.5 hrs each time. Jen was kind, fun, great. We were focused. We worked hard. I was nervous and anxious. But after 3 hours (and some youtubing at home), I was able to carry on and complete my first DAF. Highly recommend Bits of Thread… lovely place.

IMG_2195

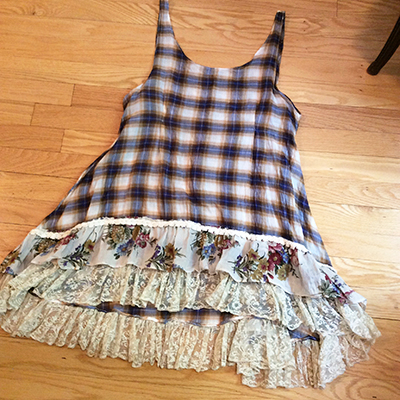
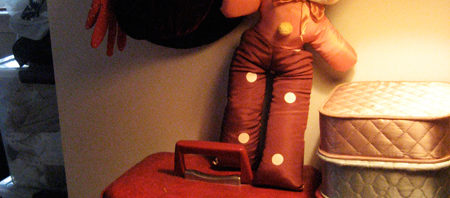
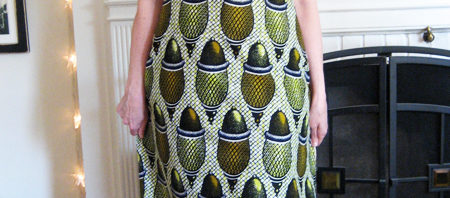
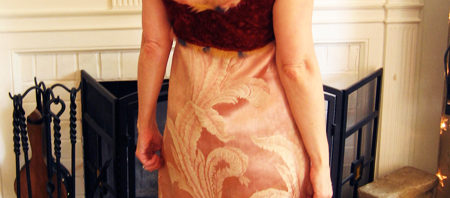
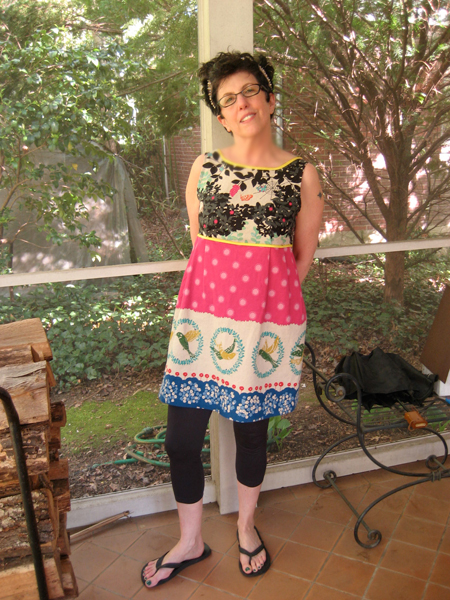
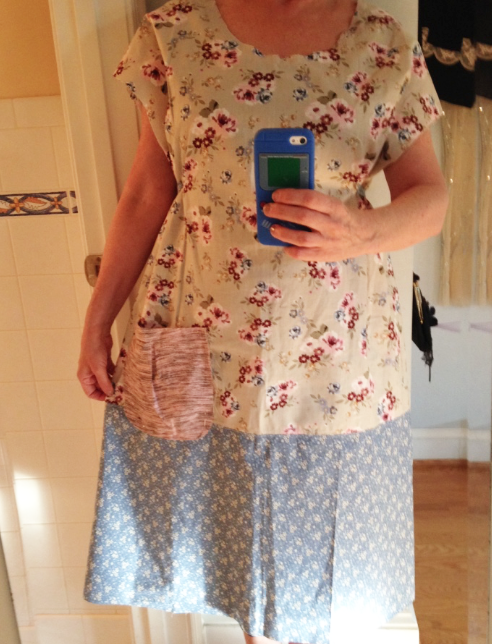
And while it wasn’t a complete tragedy (cute fabrics!), it turned out to be too big. I am 5’1″ (petite), a curvy 122 lbs, with a 38″ bust. My teacher Jen and I both thought size M looked right, but I was, as pictured below, swimming in the thing. When my boyfriend uttered the “m-word” (matronly… GASP!) I stopped short of hemming the dress, which was all that was left to do, settled myself down, and began anew. The story has a happy ending, I promise.

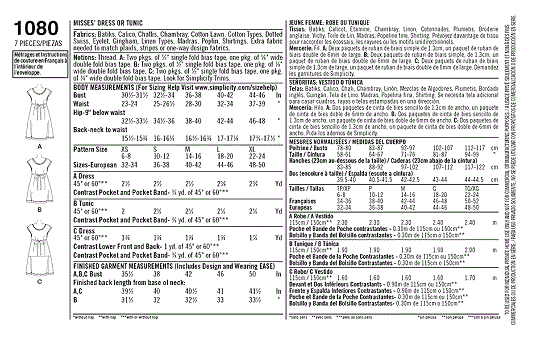
In retrospect, and to be fair to Tif and Simplicity, the pattern sizing CLEARLY shows that I should have made a size Small. So remember, go by the FINISHED bust measurement (bust is the only fitted spot on the garment, really), which for M is 42″. That is 4″ bigger than my bust… and it was just that… huge-mongous. It was big everywhere… through the middle and hips, hanging off my shoulders… droopy length. Not attractive. This is why making a muslin is advised with sewing from patterns, always. A muslin being a test-garment created from inexpensive fabric (could even be an old sheet), so that you don’t cut into more expensive textiles.

Screen Shot 2015-10-01 at 11.58.06 AM

I decided to make a “wearable muslin” which of course turned out not to be so wearable, at least by me. And I think, for any new patterns I try, that I will make a muslin. While it’s true that you will pour some long hours into something you won’t wear, there’s an alleviation of pressure that I think offsets this. And I realized something important: YOU DON’T HAVE TO FINISH a muslin. In fact, there are probably steps in the pattern you can even skip on your way to figuring out if the fit is right. I would not, for example, bother stay-stitching the neckline of the DAF on a muslin. NOT necessary. I would not FINISH seams properly as French or bias-covered or even overlocked (don’t let those words scare you but maybe do look them up), I would only pay attention to seam ALLOWANCE.

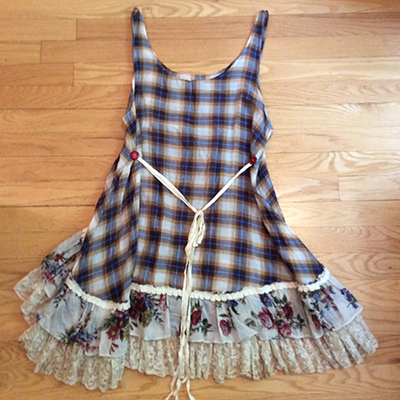
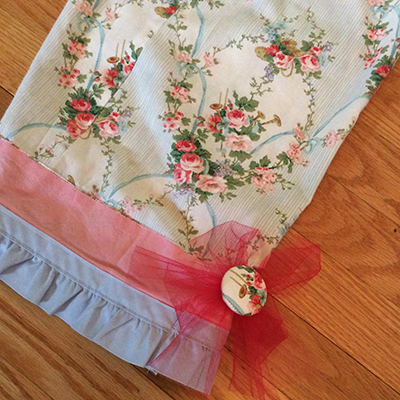
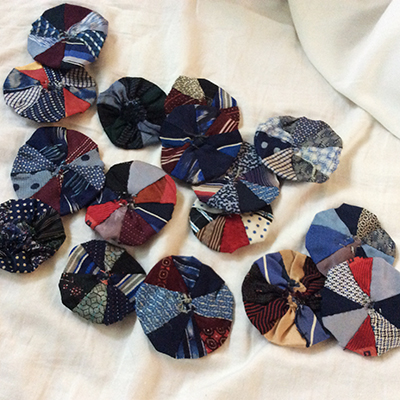
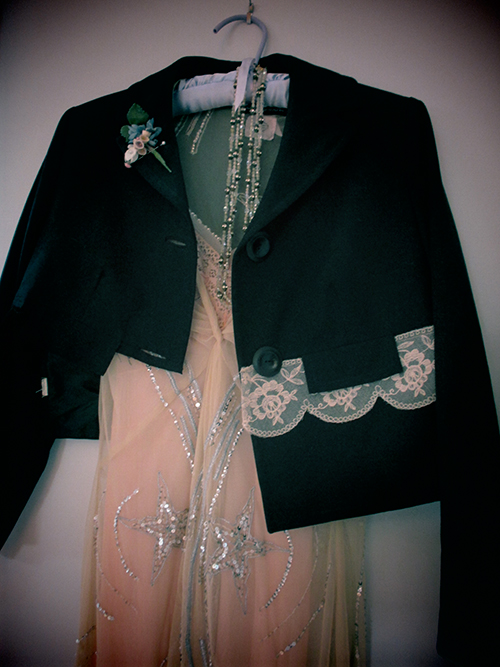
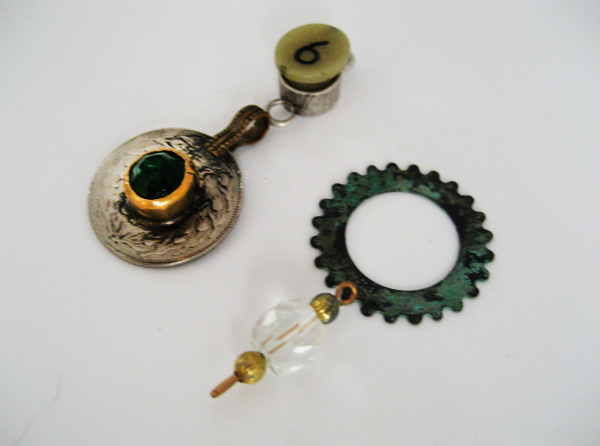
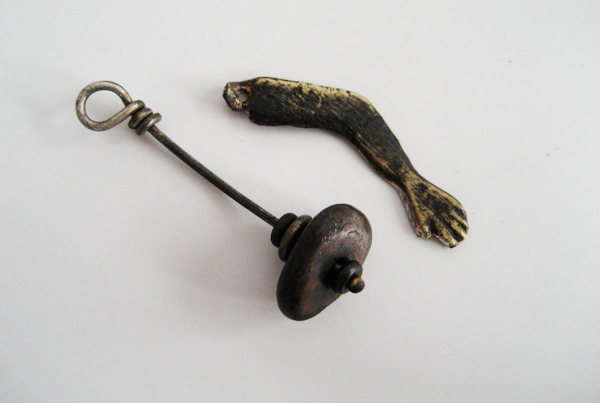
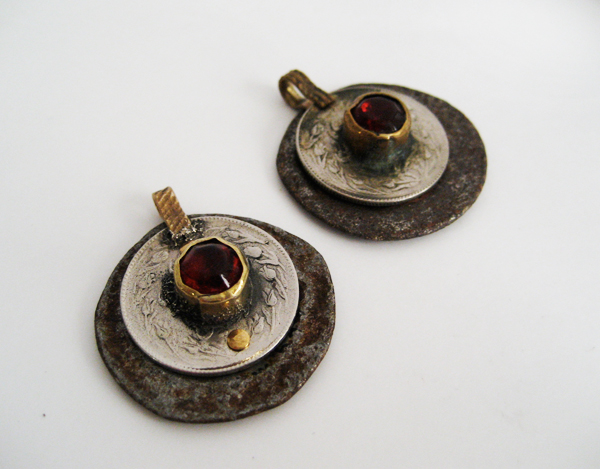
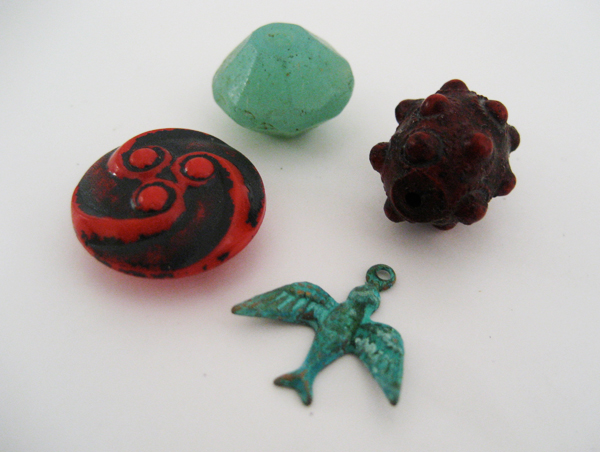
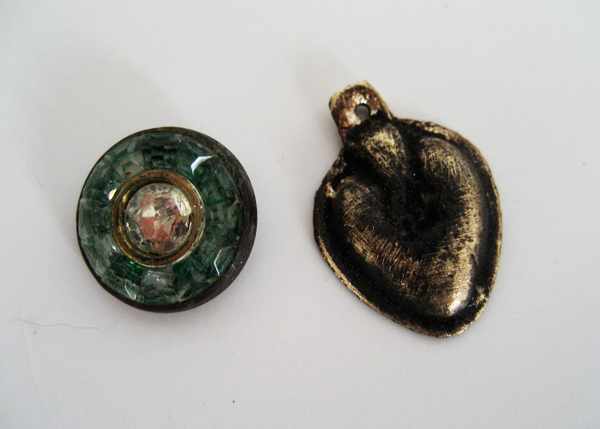
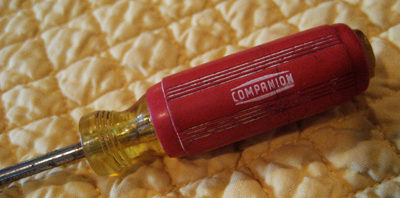
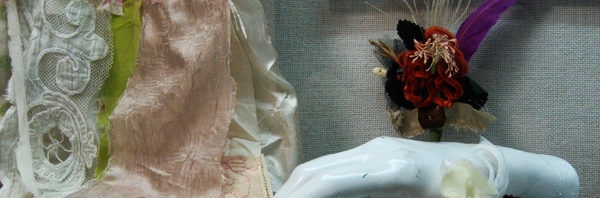
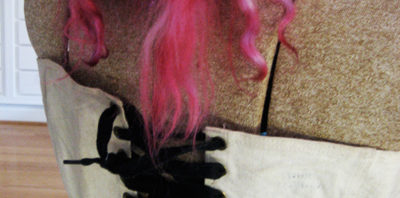
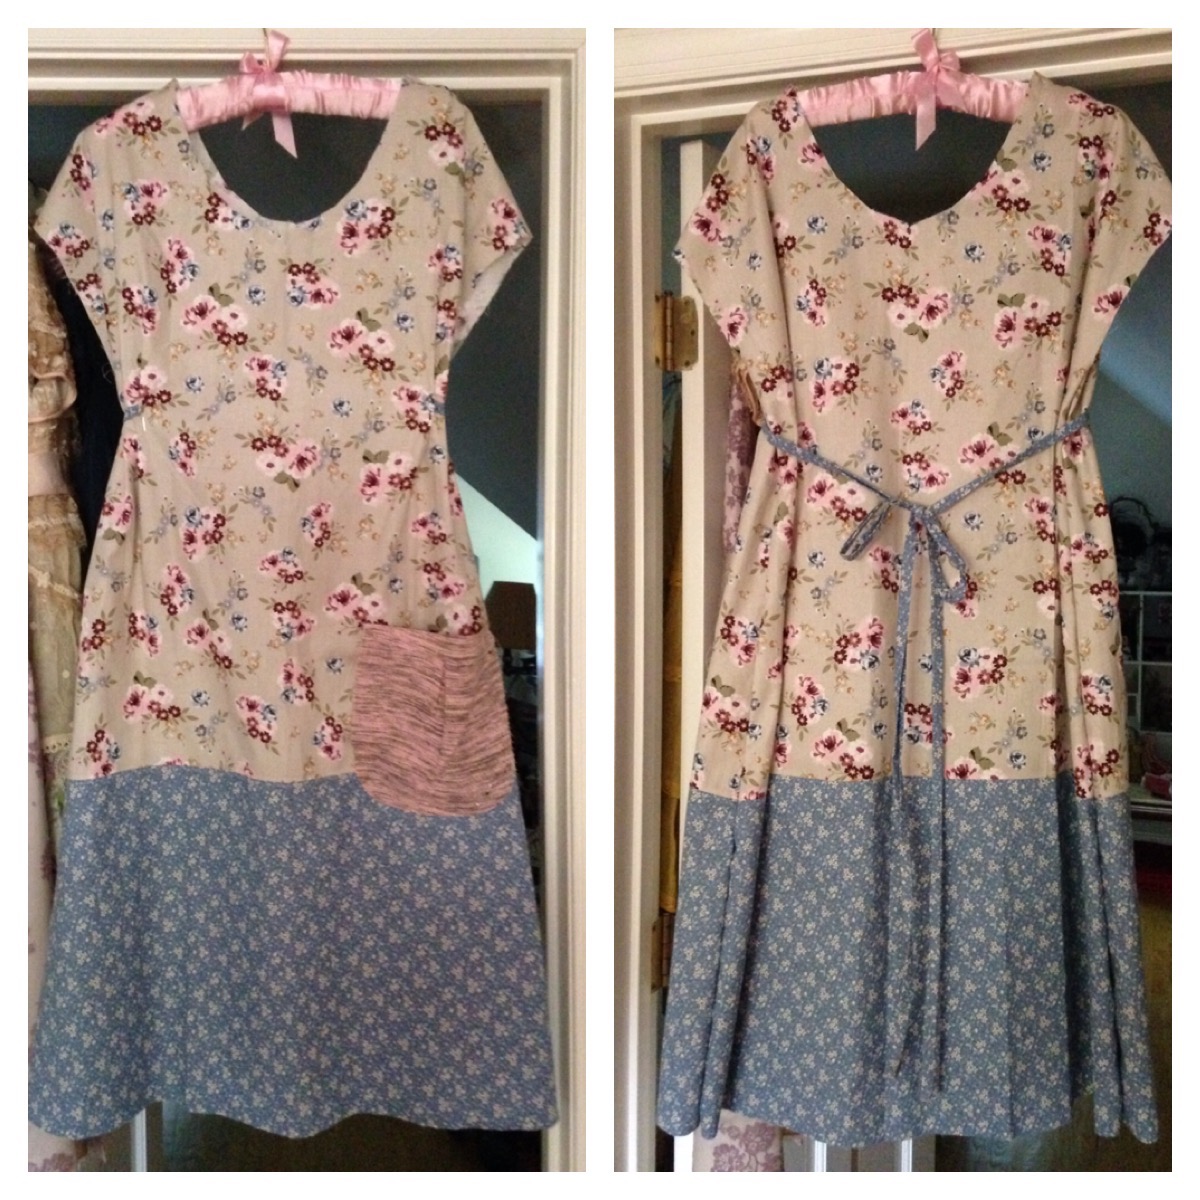
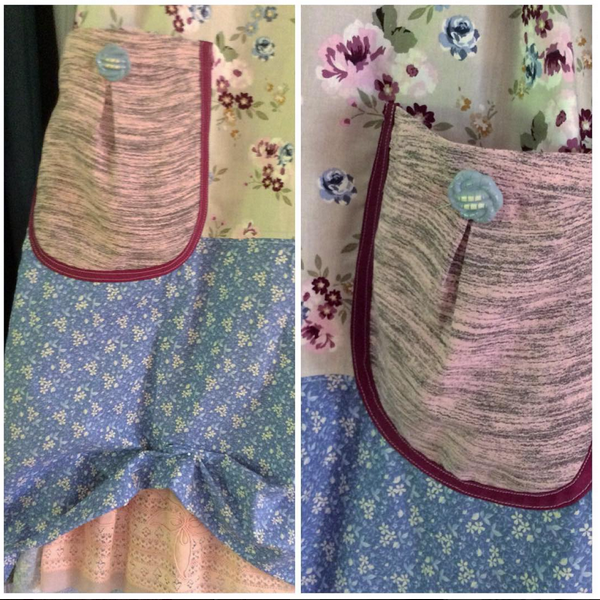
In other words, I might only do the steps necessary to determine fit, much of which I might be able to be complete in a few hours on a simple dress like DAF. Some fit issues will become apparent just by pinning, without even sewing. I was not experienced enough to make the judgement even though I pinned and tried on the garment like 50 times. Looking back, I could have recut the first dress down to a small had I stopped early enough, but I was really sort of unWILLING to admit it was too big. I thought I was too far in. As pictured below, I was choosing vintage buttons and dreaming about my vintage slip poking out the bottom. I was heavily invested so I pressed on. The good thing about this is that I got in a TON of practice before starting my second dress and because of that the second dress went faster, better, and I solved some key problems the second time around.

Screen Shot 2015-10-01 at 11.56.00 AM

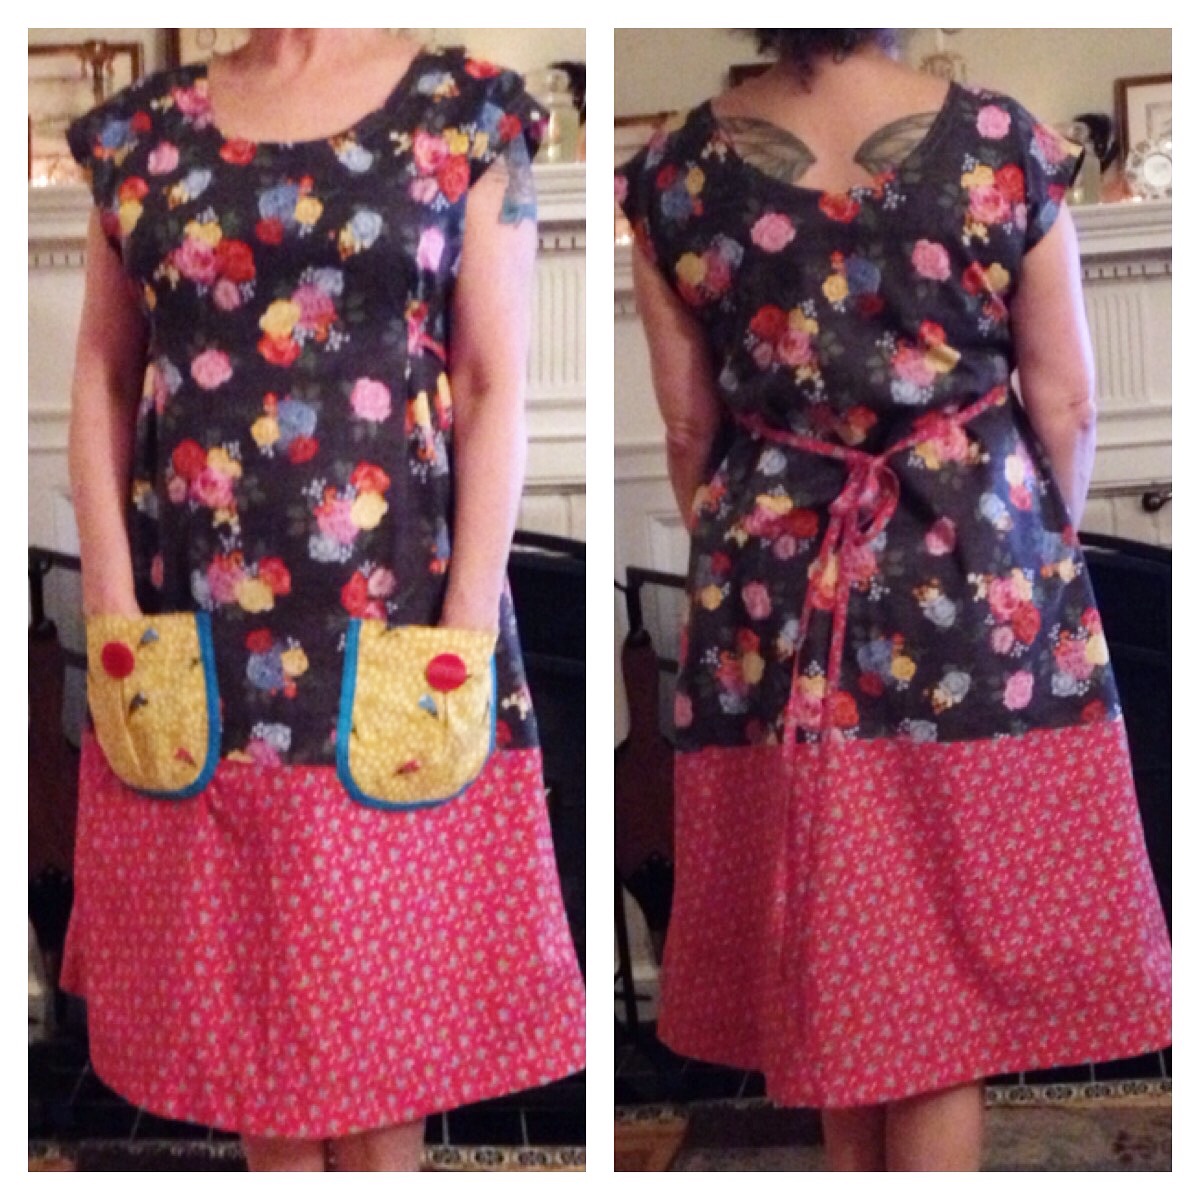
The upshot is that the size small, which I just completed on my DAF #2, is perfect for me with one tiny alteration to the pattern. I thought it might be too tight through the bust, but it is perfect. The only change I made was to lower the bust tucks and by only a quarter inch. Perfect. I will write more about this in the next post.

IMG_2227

I wish I could help if you feel that the pattern requires more modification than something simple, but I am simply (haha) not there on my sewing journey. If you think you are really between sizes, go bigger first. Then consult someone experienced about how and where you might make changes so that you are not swimming in it. You can not wear a garment that is pulling across your bust or hiked up under your armpits. You might well be able to alter a garment down that is too big. Or give it to a friend.

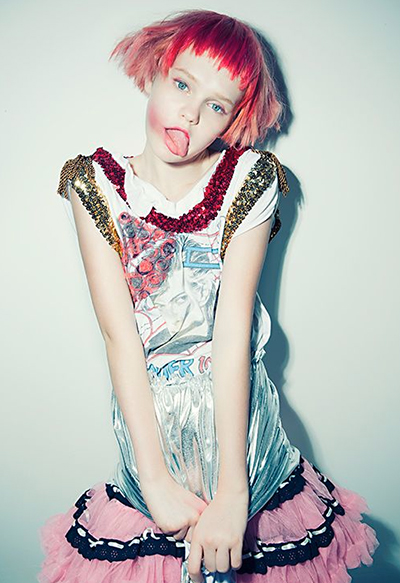
Also, get out there on the internet and do some research. There are lots and lots of photos of women wearing their first (and some second) DAFs at this point in the life of this pattern, especially on Instagram #dottieangelfrock. Some of these dresses look (to me) to be too tight in the bust and that the bust tucks are too high (which people have been complaining about and I will address later). Also study the image on the cover of the pattern without judging yourself against it; she is a MODEL. I do not have the long, lean body type of this young woman (and neither, I bet do you), but look at how the garment DRAPES or falls. It is fitted because of the back tie and the front tucks, everything else is fairly soft. Drape is the important thing you are seeking to recreate with the DAF. This garment should have a somewhat loose, relaxed fit with a cute bustline and flattering high waist. Not too loose, but casual, comfortable, with room to move about. You should be able to pick apples in this dress, feed your toddler, go out to lunch with a girlfriend. And your significant other should not utter the word “matronly.” If made in the right size, this dress will be comfy on a hot humid summer day in swampy DC, or cozy with a bulky sweater and boots in the dead of winter months.

Let’s get back to size. I do not, as yet, fully understand pattern sizes. I do know this: The system apparently has not changed much over many decades (unlike clothing sizes). I can’t figure out what my pattern size is; I’m sure I will know more about this as I buy and make a few more patterns. Another thing for certain: Pattern sizes have nothing do with clothing sizes. I am generally a 6-8 in clothing, and I think my pattern size might be 12-14. So there you go. Simplicity has chosen to go with a simplified xs-xl sizing for the DAF. Let me say this again ladies: Pick your size by the FINISHED bust size. Hopefully it will work out and/or get you close to a good fit.

Last bit of advice for this first post about sizing. Do NOT get hung up on size! If Simplicity calls you an XL, and you think you are a M… try not to take it personally! Because it’s not personal! Look, I am everything from a size 4 to a size 10 in clothing. I am NOT exaggerating. I am an XL at H&M and I’m a petite size 4 at Ann Taylor Loft. This is a fact of marketing, not a judgement about your body. And I’m going to get real bold and say this: I believe that Simplicity Pattern 1080, a truly brilliant gem, can look fantastically lovely and flattering on a WIDE variety of body sizes and types… from darling sweet scrawny chickens to big beautiful brawny babes. Love yourself, and make a dress that fits and compliments your shape no matter what size anyone is calling it. The DAF, I think, really can work for almost everyone. You might need to make two to find out, but as you will see in my next posts… there is SO MUCH really fun stuff to learn by making this dress, you will only improve a myriad of techniques, and each dress will likely surpass the last in many ways.

I’m on instagram now with lots more pix there, though you’ll have to put up with myriad kitty photos.

Learning Small

IMG_2779

I prefer working small; the above amphora necklace focal is 1.75″ tall, plus the millinery and stick pins. But since I’ve been seriously delving into the polymer clay medium, I’m realizing that even the smallest object holds the promise of so many lessons, from forming to surface texture to paint.

IMG_2760

The photo above is where I left the object last night… it had finished baking and I was disappointed with the dirty gray color and lack of translucency (I had mixed in gold leaf to very little effect). Still some things to master, but I wasn’t going to let all the work I’d done be for naught so I slept on it, and put some intentionality toward waking up to work on it some more, knowing that paint was the answer but feeling too sleepy to carry on.

IMG_2783

I’ve never been a clay or paint person, in art school or in my 30 years as a practicing artist/designer; I am now falling in love with handling clay and with applying paint in built layers. To make these amphora charms, I’ve taught myself how to create a slab vessel out of clay, because I wanted these to be hollow… more lightweight (for jewelry), and more real. I sort of made it up as I went along, doing what seemed to make sense. Softened and rolled out a sheet of clay, and started forming it, then making and attaching the neck separately from the body.

IMG_2784

None of these images capture fully the delicacy of either the textures or painted colors. By using the dirty gray as my middle tone, I was able to add shadows or low lights and high lights, applying pigment slowly. Close up above shows a bit more of the detail.

IMG_2782

The texture of the wing was produced separately from the vessel (stamped into the clay), with the top level sliced super thin like the thinnest swiss cheese and then applied to the surface. After this, the piece can’t be handled much until post-baking. All of these techniques can be learned via tutorials and videos on YouTube. I’ll try to find time to add some links to this post soon, but a quick search on Etsy and YouTube will yield everything you need. I’ve been studying and learning so much, even just making a tiny little object like this.

A Visit from the Muse Squad

IMG_2651

My creative impulse tends to build to a boiling point during periods when life is too busy, chaotic, stressful… and then as soon as the gift of time is provided… it’s like the floodgates of heaven and hell open, simultaneously.

IMG_2583

It started with this object, a very ancient glass bottle that I purchased in a crazy hippie crystal alchemists shop–The Crystal Fox–in Laurel, Maryland of all places. I think there was something about that visit that set things in motion; I’m blaming it on breathing too much incense smoke as Molly and I were in there for like three hours.

IMG_2646

This second object is something I’ve wanted to make for a truly long time, and after finishing it I realized its relationship to the image in the So Charmed website masthead, an image that has always compelled me in powerful ways. The boot is ceramic, and I made the teeny little vintage-style hatpins.

IMG_2691

The tiny ceramic or bisque boots are dear and expensive, so the following day I set about to make one out of polymer clay. The above piece thus is entirely handcrafted and I’m not sure I don’t like it better. Anyway, I plan to make more in both styles.

IMG_2671

This little guy is an ancient bisque doll, dug up from an abandoned factory in Germany and poor thing was headless, as so many of them are. I dearly love animal-human hybrids (this is my second foray with this concept for jewelry) and felt this one to be incredibly successful, to the point where I may not be able to let go. More are planned.

IMG_2709

During a manic creative period, there is a point where things either peak in an orgiastic art-fest or flame over the top in a heated blaze that can make one feel truly a bit mad. It is hard to know which thing is happening, only that it IS happening. Hence, Octoboy.

IMG_2721

An amphora bottle with velvety millinery and more hatpins. Hard to see but there is a ring of tortured rhinestones around the top. I spent most of the day on this, and I’m very happy with the result. Riveted holes will allow me to wire it for a necklace.

IMG_2715

I am going to continue making these with the intent of selling them at So Charmed. But… as always, how to price?? It’s so very hard. These take a day to fabricate and an endless amount of supplies, some of them costly. Above is the table in the dining room where I keep clay supplies so that I can be near the kitchen for baking. Below, more supplies and tools.

IMG_2714

Look closely, do you see two tiny Jiffy toothache medication bottles? Since Molly is refusing to give up her soon to be yanked wisdom teeth for the sake of her mother’s art (Mom, get your OWN out!)… I was forced to make some little toofs out of clay.

IMG_2726

Here is the entire collection to date. I love seeing them together as it suggests a certain consistency of vision that will manifest itself in so many differing and delightful directions. Yay for the muse!

IMG_2723crop

Adventures in (polymer) Clay

moonrocks

I have a love/hate relationship with polymer clay. After shunning it for years based on my perception of the overly cutesy-wootsy suburban housewife crafter (gingerbread men) and psychedelic hippie (cane) aesthetics, I’m here to tell you, polymer has come into its own. This is my second foray into this medium, the beads above were made a few weeks ago. And they got me very excited indeed about the possibilities for this medium.

firstclay

As I set about to experiment again with polymer clay, I came up initially with the pieces above. I felt they were okay-ish. But they somehow felt a little safe. The leaves were beginning to have a nice, burnt feeling to them and I went on to create the entire suite of components below (Burnt Offerings collection).

burntofferings

burntofferings2

What you can see here is my experiments in both surface texture and coloration. Do I start with dark or light clay? Paint it? Powder it? Gold leaf it? Smash it, scratch it, etch it, impress upon it, embed into it, bake it, carve it? The answer is yes! All of the above and more! Polymer is a really forgiving and soft surface, and therein lies its beauty and frustration. You can get GREAT results. If you handle it after you do, those results will smooth back out quickly. It seemed like starting with a batch of small components was a great way to experiment without wasting supplies.

underseafocal3

Of course, you know me. Attention span of a gnat. Easily bored. Gotta go over the top. The above/below piece is a focal for a bracelet, entitled Octopus’s Garden. It has holes on either side to attach chain or ribbon, and a nice curve for the wrist achieved by baking it over a soda can. Features some of the burnt leaves poking out of a dark and spooky garden. With a squid tentacle and of course bling/sparkle/glitz. Because I can’t help myself! Darkness and light, people, darkness and light.

underseafocal4

I did not invent any of the techniques you see in use in these pieces… they are out there for the grabbing… all over YouTube. I probably watched about 8 hours of how-to videos over the course of a week while I was working on these pieces and collecting up some supplies. Just go over to the site and search for polymer clay, it will all come up. And you can follow links in the videos for additional blog posts.

underseaB3

Most supplies are available at any craftstore; I went to Michael’s. I also stood in the aisle and read most of a polymer clay how-to book, so as to not have to buy it. Picked up some valuable tips! It was a full immersion into the medium… and I’ve still got a very long way to go with results. I like what I’ve done, but I’m still working it out.

foramusementonly

Having started with black clay, it was challenging to get any contrast going with the textures/colors. Although it’s even more challenging to photograph these, and they actually have a LOT of coloration. Above you see experiments with a sparkly white clay, as well as embedding a vintage image under a glass dome. I think it’s important to mix polymer clay beads in with other kinds of beads as you see in the curation above (which will be a necklace) entitled For Amusement Only (imprinted on the vintage brass carnival token also pictured).

So, this is as far as I’ve gotten with this round of polymer. I’m pleased and excited to make more things. There are some truly amazing polymer artists out there who make the clay look like everything from metal to raku-fired pieces. I’m no expert, but if you decide to play, feel free to get in touch with me; I’d love to chat! Unless you decide to make ginger-bread men… then I don’t really want to hear from you. JUST KIDDING!!!!

PS: I have not yet bought the requisite pasta machine for kneading and rolling clay. I’m not sure I’ll need one for the small batches of work I’ll do.

Grunge Was a Thing

grunge9

You know, way back in the ’90’s. Nirvana, Marc Jacobs, flannel, old boots. Well, it became a thing, but I’m old enough to tell you it was there long before Vogue mag declared it a fashion thing. I think by that time, I’d been shopping for clothes primarily in thrift stores for 2-3 decades, favoring girly dresses with combat boots for awhile. And I wasn’t the only one before this was co-opted by the media machine.

grunge6

The preference for things worn, used, tattered and torn–objects with a previous life, a history, with distress, destruction, and survival felt natural to me as a form of escape from mall-ified suburban America. So, what does it mean when we MAKE things that are new appear very old (above)? Thrifstores–once filled with glamorous 40’s gowns and beaded cashmere sweaters–are palaces of polyester these days. There are crusty jewelry parts coming out of Russia and Afghanistan these days, rather than Value Village… the cost is a bit prohibitive on most of it.

grunge5

This is shiny new brass. Un-grunged. It’s soaking in dish soap to remove oils so that the chemical agents can do their job. This does not always work, but it’s a good place to start. I can’t imagine using it in its glittering raw state for much of anything. But transforming these pieces is a metal adventure.

grunge4

Above are bits and pieces in the process of destruction. It’s messy and sometimes stinks like rotten eggs. It’s incredibly unpredictable, which is both a frustration and a huge part of the allure. Without knowing the exact composition of the metal you are trying to distress (copper? brass? nickel? steel?)… it’s impossible to predict which chemical might have an effect, and just what that effect will be. There is a lot of scrubbing and soaking, wiping/sanding and re-soaking to achieve a great patina (the professional term for grunged out metal).

grunge1

I use chemicals made by a company called Jax. They are hazmat so I order up a few bottles have them all shipped at once. It’s hard not to think of the chemicals as precious, so when I start patina-ing, I run around my studio throwing everything in sight into the soup. Jax makes many different solutions for many different metals… I stock about 4-5 of these and use them interchangeably, sloppily, and without any prescription or recipe.

grunge3

I’m really loving the verdigris patina lately. After a long while of this not seeming to work, I’ve got it DOWN, getting awesome results. Again, not predictable, with verything from pale blues to deep turquoise, to weird shades of green appearing randomly.

grunge13

Brass bits are cheaply procured, but I think most of these pieces use very old dies. Using patina brings out the original workmanship, missing entirely from a glaring gold surface. Just look at those tiny swags… SO CUTE! But they just look crappy in gold.

grunge12

Not to be contradictory about the gold, I sometimes throw gold leaf into these designs, furthering the look of a decayed gilded age. These Belle Epoch earrings also have  RAW ruby dangles… raw stones are grunge, tumbled are not! So yes, I’m removing gold, then adding it back in. Seems insane, but is really just so much fun.

feedsackyoyo

So, back to grunge. Since the 80’s, I’ve never stopped loving tartan; this is a dress I made last summer from the softest flannel and a daisy chain of feedsack fabric yo-yo’s (30’s-40’s).

marcjdetail

And I’ll admit, I loved the Jacobs collection in the 90’s; I didn’t resent the elevation of streetwear to high fashion. It’s what always happens and sometimes the results are truly great. Above is another dress I made this summer… the delicate very sheer plaid voile fabric is by Marc Jacobs, a self-referential nod, don’t you think? Plaid looks great with florals and lace.

grunge11

The September earrings would look so good with that dress! Should I keep them? The bead caps on these things are RIDICULOUS. Very medieval or something. And yep, they were super shiny gold, now covered with crusty soot. The beads are palest blue lace agate and Picasso-finished Czech glass beads.

maddiebangles

This bangle stack was made for a client this summer, a gift to someone special. I do these mostly by commission, so email me if you’re interested. They feature tarnished bangles from India, reclaimed sari silk, and lots of other beads and elements. Grungy, bohemian cool.

grunge10

Here’s a recent photo I’m very taken with. Bratty children can be extremely grunge. Their hands sticky, their hair chopped. Their ragged mismatched clothing. The colors above are my palette of teal, rose, gold. You can find images like this over on my Pinterest boards.

grunge7

I’ll be rocking my grungy jewelry in massive layers this fall. I’ll wear too many necklaces (including this one that features a destroyed Cadillac hood ornament! The other is an old Afghani treasure that was falling apart and I sort of patched it back together), WITH earrings AND bracelets. Yeah, grunge was a thing. I’m glad it still is.


Don’t Fear the Knits!

detail

A key quality for making things is a certain fearlessness around one’s tools and supplies. I don’t know where this comes from, for me it has something to do with time (decades of making) and age (being ancient and just not caring). Many women I know confess to owning machines but being scared to use them… I was also that woman, so I understand!

Now that I am over my fear of the machine, I’m left with other anxieties… putting in a zipper! Sleeves! And until yesterday… knits! Not t-shirt knits… sweater knits.

And that’s when I ran into O! Jolly!. Olgayln is a master knitter, with a really fascinating history of working in theater and music. And, she has been making, selling, and CUTTING UP gorgeous machine-knit textiles for quite some time. Her blog, Crafting Fashion, about working with knits was the key to unlocking my fears, and I’m so grateful.

knits2

I created the little grunge dress above by cutting up a very open-knit sweater (terrifying) and, thanks to Olgalyn using bias binding tape to seal off the cut end. Below is a shot to show you how this looks.

knitsinside

I thought that the whole sweater (thrifted: $4) would unravel before I had time to walk ten feet from my bed cutting table to my machine. This did not happen.

knits1

The body of the dress is Indian cotton, very light and airy, about $6 a yard. Suffice to say, whole worlds of stitchy fun have opened up. As soon as the thrift stores start stocking sweaters again, I’ll be off and running.

knits3

If you are a Blythe-ette (and I know some of you are) you will want to dress like your dolly and she of course is wearing Cangaway. When you hit the link, be sure to visit her SOLD section. These fabulous dresses (about $30 ea) sell immediately upon listing, and I’m talking MINUTES. You can get on her “first to know” list and receive an email a few moments prior to her listing and then you’d better strike fast. Pictured is my Sophronia, decked out in Cangaway, plus Mad Hatter top hat by yours truly.

Last but not least, if you are or will be in New York on 7/22, I’d highly recommend a workshop Olgalyn is giving on making a shrug from knit fabric. I hope to make it to one she might schedule in the fall if any local ladies would like to consider caravanning to Brooklyn.

When an abandoned scarf became a glamorific shrug…

scarfshrug3

I was delighted to find this gorgeous scarf at my local thrift, buried behind about 100 of her ugly stepsisters. Although I don’t wear scarves, I couldn’t pass up this fabric which put me in mind of a 70’s super-glam brand called Sweet Baby Jane for the Plain Jane clothing company. I used to scour the High Street boutiques on the OSU campus in Columbus, OH looking for these rock-star boho retro fabulous garments. If you remember this brand, check the link above to learn what well-known company it transformed into during the 80s.

scarfshrug

And with its angelic cherubs, the fabric also puts me in mind of iconic 80’s Italian clothing brand, Fiorucci. I remember squeezing into a pair of the skinniest Fiorucci jeans ever by lying on the dressing room floor in order to zip the zipper. I think they were gold. Metallic.

scarfshrug2

If you look closely at this delicate, crinkly, sheer rayon, you can see that some of the little stars in the print are covered with actual gold glitter. Yeah, for $1.99 this was going home with me and I’d figure something out.

So-Charmed-Shrug-from-Scarf

Making this really could not be simpler.The bulk of this “project” is in locating a great scarf to use. It should be an elongated retangle, not a square, and in flowy fabric. Measure to fit, sew two seems and voila!

Feel free to share this idea and the instructions above by linking back to this blog. Larger photos can be seen on my flickr. Thanks! xoxo

Sewing Hands are Happy Hands

textiles

Friends on Facebook know that I’ve been obsessively sewing again; this post gathers together images and ideas, a greatest hits of the allure of this activity for me.

1. Textiles. Probably the number one reason I sew is a deep, enduring love for textiles. My passion for fabric seems to know no bounds and each time I get back to sewing there is a literal world of discovery awaiting.

inthemood

The love of textiles takes me adventuring to Africa, India, Japan, Europe (without leaving home)… crossing decades and centuries (without a time machine), exploring history, industry, technique (sans a classroom). Textiles invite anthropological inquiry and ultimately make me feel connected to societies I can never really know, particularly societies of women. And, thanks to the Worldwide Web, sewing takes to me to Mood, NYC. True, Tim Gunn isn’t around to soothe my nerves, and Swatch the dog is but an on-screen image. Still! Mood!

marcjdetail

Above are textiles from Mood that I managed to match from online images only, remarkable, really. I’m having a huge 90’s grunge moment and the plaid is by Mr. Grunge himself, Marc Jacobs, a delightful, sheer voile fabric. The floral is fine silk and a complete bitch to sew. The lace is antique from a yardsale, as is the ribbon.

marcj

Front of this dress is shorter than the back.

marcjback

Ties make it fit nicely for sizes 2–8.

pinkindia

The dress pictured center is made from the sheerest bone white cotton voile from India, block printed with a lovely pattern just begging to be a sari babydoll dress. These textiles can be had for about $6-$12 a yard (and up), via a handful of dealers on both ebay and etsy. I have never been disappointed with this yardage, colors are bright, patterns run from traditional to sweetly off-kilter interpretations of Western themes. And how fun to receive packages from around the world!

pinkindiadetail

2. Analog. To be fair, my sewing machine is a sophisticated computer…

sewingtrimmed2 thumbnail

CLICK IMAGE ABOVE TO PLAY VIDEO.

…but that isn’t at all what I love about it… and for the most part I ignore this aspect in favor of the older school functions that have been performed by machines since sometime in the 1700’s. The 10 second video above shows my machine in action, overcasting (which means I don’t need a serger) a length of delicious cherry silk polka dot fabric, also by Marc Jacobs. I love the visuals, I love the sound! And you can’t have enough ruffles, right?

dottyruffle

3. Mad Skills. Sewing requires many skills that I do not currently have. I learn at least one or more new things with each project I undertake. As with other challenging activities, the knowledge is cumulative and improvement takes practice, over time. A few tips if you are, like me, an impatient novice:

Make something simple that you will honestly love and that falls within the current limits of your ability. Then make it again in another fabric. And again, with a slight variation. Each time, push yourself just a little. You will end up with three cute garments that aren’t perfect but are perfectly wearable.

The right tool for the job… i.e., know your needles, cutting implements (and keep them sharp), measuring tools, markers, etc. Build your tool library slowly on an as-needed basis… learning as you go. Have your machine serviced bi-annually once you really start using it.

Watch YouTube videos! There is NOTHING you can’t learn on YouTube from sewing bias tape to working with bitchy silks. The sewing videos are often funny. You can pause, rewind, watch them dozens of times late into the night….

Make mistakes, then fix them as best you can and MOVE ON. Nothing handmade is perfect. If it is, it’s boring.

dottyindigo

4. Relationship to day job. Sewing is very different from graphic design; my day job. But there is a lot of overlap and I take advantage of this. There are applicable skills; color sense (and nonsense!), measuring, constructing, and the joy of ideas or concepts combined with the tedium of production.

dottyindigo2

It feels great to access 30 years of art and design experience in service of wearable creations, all while pushing myself to learn more. The piece above, a swingy tunic (or very short dress) was created from a pattern I made myself, copying a tee shirt from free people. The learning opportunities are endless with sewing.

julie2

5. Upcycling, and the romance of need. Sewing your own clothes is not a choice to make simply to save $$$. In today’s world of H&M &tc, fast fashion can be had for dirt cheap. If you purchase NEW yardage, there are bargains to be found… but there are many delicious fabrics you will lust after that are trés expensive. You’ll also need a lot of auxiliary supplies and will be running to fabric stores constantly for matching thread, picking up MORE yardage that you really don’t need… just ’cause it’s there.

scarlet

And then, there are curtains. The two most influential films of my childhood, “The Sound of Music” and “Gone with the Wind” feature heroines rising to the occasion of style-over-means. Remember the VonTrapp children frolicking through those oh-so-alive hills in their shameful, adorable garments made from the Captain’s living room curtains?! And Scarlet, OH SCARLET! Who can forget her fabulously rich green velvet curtain ensemble???

curtainbloomersdetail

When not busy searching out bargains on Mood.com, I’m combing my local thriftstore for textiles. Curtains, tablecloths, bedspreads and sheets… the most amazing vintage fabrics, at pennies-per-yard can be found on almost any trip. The bloomers above and below were made from curtain yardage, two panels at a total cost of $4.

curtainbloomers

The three fabrics came SEWN TOGETHER. All I had to do was cut. Oh, and I patterned these for a perfect fit by copying a pair of pajamas, also scored at the thrift.

oldcurtainsdetail

The ruffle trim on this flirty dress was also once a curtain. Dotted swiss in a spicy mustard shade, probably circa 1970-something.

oldcurtains

6. Collage of disparate elements. In all of my creative pursuits, from jewelry to sewing, I lean toward bringing together things that may not belong in the same project. Below, I trimmed a super soft ombre flannel dress with a length of handcrafted yo-yo trim made of 1930’s feedsack fabric. Feedsack is a collectibles world unto itself, but the yardage has become quite expensive… and is mostly available in smaller pieces (duh, feedsacks). This was a fun way to incorporate the wonderful patterns and textiles without spending a small fortune.

feedsackyoyo

I’m currently obsessing over Japanese textiles and techniques. Below is a babydoll tunic that features very vintage Kimono silk as a ruffle, with the main fabric a “homespun” from JoAnn’s. If you go to JoAnn’s, ALWAYS print out the week’s 40% off coupon… it’s good on yardage! If you forget, email it to your phone from the Web when you get there.

kimonodetail

Vintage Komono fabric, much like feedsack, is dear ($$$) and generally available only in smaller pieces b/c it is loomed in the right amount for making Kimono–no waste, making it perfect for trim. The colors and textures are gorgeous. I very boldly tea-stained the dress body after completing it as the stark white wasn’t working with the vintage fabric. Scary, but worked great.

kimonogrunge2

I’m itching for a larger, more involved project after all of these simple dresses, and am about to embark on a piece that will use new and vintage indigo textiles and will incorporate Japanese Sashiko and the boro aesthetic.

Watch the flying fingers in this video as she creates rows of Sashiko hand-stitching. You’ll also see this technique in India, on Kantha quilts. The effect is lovely.

necktieyoyos

I may incorporate some of these quilt y0-yo’s made in the 1940’s from men’s necktie silk into this upcoming project.

sashiko2

And here are my first practice stitches, done on my old jeans in a doctor’s waiting room. The point is to make all the stitches uniform in size and spacing. But I have seen loads of ancient cloths where the stitches–made perhaps in haste to get a farmer back into the field–don’t look so far from my own wobbly and inaccurate attempts.

Stay tuned! xoxo

PS: Big thanks to Molly for showing me a) how to send a JoAnn’s coupon to my iphone and b) how to get a video off my iPad, into iMovie, and embedded in WordPress… with a thumbnail!


Large v. Small, Left v. Right

circustribalcandy

In my work as a designer, both my professional communications design and jewelry design, one of my very favorite aspects has always been the toggle between big picture thinking and small detail management. I’ll assert that having a love and capacity for both aspects of design is a rarity for the creative soul. For me, it took decades to reconcile the fact that I feel most deeply satisfied when both left-brain (creative) and right-brain (reasoned) thinking come into play. I like to make a mess, but I like to clean it up too. I love big ideas but I love tiny little decisions as well. I believe this series of new necklaces exemplifies what I’m talking about. Click on the images to see them much larger or visit with them on my flickr.

tribalcandy3

My strategic communications work is always in service of a story; whether about meetings for healthcare professionals or the annual findings of a trade association… a narrative unfolds in words and pictures, often with an actionable objective: Enroll, donate, attend. With jewelry, I’m up to the same kind of storytelling, although it tends more toward abstraction. Nothing compares to the excitement of ideas and meaning. I believe this is what we think of when we talk about design. What is the story we are telling, and, importantly why, and to whom?

goddesscandy

Making connections is part of this concept process, in communications I connect text with images in creative ways and with jewelry, I make, source, and bring together disparate elements… often from countries thousands of miles apart, and decades that now fall across two or even three different centuries. An early plastic button from the 1940’s or a glass Victorian one, beads from Africa, tassels from Asia, mid-century American toys, the tin lid of an oil can from India… how can these things possibly tell one story? With jewelry, the stories are sometimes gathered over years and finally come together unexpectedly. This is the part that seems magical (but isn’t, imho).

bluesteggycandy

Once the elements are selected, located, obtained or made, the right-brain engages as I work out actual construction issues. Whether I’m creating style sheets in InDesign, or linking fine threads to metal… problems must be solved at a more micro level. I find this to be the most challenging place in the process; the place where I may want to turn away from the project and find something new to conceptualize, because that’s just so much more fun and flows more fluidly for me. That said, this construction place is also the land of greatest reward (soldering, for example!). When I stick to it and make something impossible work, I am so damn proud of myself! the storytelling comes easily and readily, like breathing. Am I lucky or cursed?

tribalclockcandy

The final stage, or production, is the most micro of all. This is the time where most of the big picture problems are solved (though sometimes these can change even at this point) and where I buckle down to wrap tiny strands of thread around and around for hours, detangling as I go, or sit quietly and sew on minuscule beads one at a time, perhaps I’m styling text for hours on end, bold, italic, larger, smaller. I generally and truly delight in the zen of this work, though too much of it becomes boring and my mind will start to itch. This is why it’s great to have several projects going at once, a brochure being designed, another being produced… necklace concepts coming together, materials arriving from distant lands, pieces being made and photographed and shared.

Which stage(s) of design and making do you love most? Where do you have to push through difficulty or boredom? How does it affect your work? I’d love to hear from you!

My Reconstructed Life

fallsewing3

As the weather turns cold, I seem to turn to textiles as my preferred art form. Pictured above and below, a recent construction. The beautifully embroidered top was found as-is, been trying to find a way to work with it for YEARS. Ancient tattered and be-sequined black tulle/lace affixed. Worn as an apron (ties in back) over a very vintage cream slip. I love the way my bones necklace looks with it and will probably wear this all together.

fallsewing2

fallsewing

Made this a little while ago, a fairly simple deconstruction of a thrifted vintage black wool jacket, with some very pretty very old lace. Beneath it is an Antik Batik dress purchased at a consignment shop in the Marais Distric, Paris. Most divine thing ever.

fallsewing5

Another decon jacket with children’s scissors affixed. Has weird red velvet reverse patches and several men’s ties, one of which hangs down like a long strap from the bottom. For some reason, I’m always narrowing the sleeves down to being very skinny and fitted.

fallsewing6

The back has more of the strange and surreal shapes. I think this one is sort of Schiaparelli inspired.

fallsewing7

Another (and very moody!) shot of two pieces from last year… very tribal 80’s fusion, with neon and animal print and vintage Afghani jewelry for sytling.

fallsewing8

I shall leave you with this, a dress you may have seen many times, The Broken Teacup. I still delight in this piece and am always amazed to see it linked and pinned all over the Internet. You can visit all of these photos in larger sizes over on my flickr.

And now… back to sewing, dears!

WIP: Tassels, Not Hassles

afghanicamel2

The completed necklace above is fashioned from an Afghani artifact, a heavily beaded tassel, probably used to decorate a camel. This is unlisted due to my complete inability to part with it.

tassels

Here then, is another gorgeous tassel I’ve been trying to work with, this one is African and made of leather. The colors are amazing, both dirty and brilliant in perfect combination. The beaded ring is my addition but I can’t seem to properly finish this WIP.

tassels2


tassels3

Above is the most recent tassel experiment, made from an upcycled plastic Winchester rifle bullet casing that is insanely rusted and distressed, then gilded (of course). I have a batch of these in the most wonderful desert-faded colors. This is all very unfinished, just playing right now with materials and thought you’d enjoy seeing the influences leading to the design.

tassels4

I know I will be using these Indonesian blue glass beads; amazing color against the red.

tassels5

And the Indian sari silk fiber is working for me. I love how all of these tassely objects are related to one another, coming from arid deserts and plains, the recycling and repurposing, how in some cultures even the animals are adorned to the hilt… but the humans too. I don’t know what I’m saying, I’m just…. all jazzed up about… tassels.

These pics are over on flickr in case you want to ogle them larger.

Lastly, I am planning to donate a portion of proceeds from any/all jewelry that utilizes bullet casings to a US gun control organization, so if you want to recommend one, please comment or email me.

WIP: Rocking Out

WIProcks

Suddenly. In. Love. With. ROCKS!!!!!! Pictured above, from the top: fluorite, blue calcite, citrine (but suspiciously looks like calcite and am contacting dealer about this), raw garnets (!), amazonite and quartz points. Gemstones are MUCH cheaper by the strand, and ebay is a good bet for locating best pricing.

WIProcks2

Big batch of Rocking Rings made yesterday, now being varnished to protect the gold leafing and patina work. As soon as they’re dry I’ll start listing. They are really and truly beautiful, if I do say so, and although chunky, very wearable. Earrings are coming next, can’t wait to play with these stones in that context. As always, larger photos up on flickr for your viewing pleasure.

WIP: Gilded Age

wipgilded

Have discovered gold metal leaf.

wipgilded3

Am in the process of gilding pretty much everything in site, including this amazing piece of Russian military surplus, a small metal tube that will become a necklace focal. I’ve got a batch of these babies to play with.

wipgilded2

And this simple pair of vintage brass findings… I love how the metal leaf clings to and shows the fine detail of the… metal leaf(s).

wipgilded5

A big-ass ancient glass chandelier crystal gets the gilding treatment, creating a weird world-within-a-world effect as you can see the inside of the other side through the front side. Yeah.

harmonics

Here’s a finished piece, a ring holding 2 raw crystals, citrine and amethyst. Then goldified, oxidized, and totally effed up. In a good way. I hope. Ring section coming soon over at So Charmed. Lots of these beauties will be for sale at rock bottom prices. harhar.

Bigger pics for better examination of the (charmingly) rustic and pathetically unskilled job of gold leafing of which I am capable: flickr.

A great gold leafing video, watch and learn and then go make your own mess!

WIP: Odd Pairings

wippairings5

I like to fool myself into thinking that anyone could possibly be interested in my creative process, the inner workings of my designing mind at the earliest stages of making things. Hence, WIP (work in progress). Everything here represents an idea in formulation, not remotely finished.

wippairings2

This is how it begins with earrings. Vast supplies in my studio. Many little things scattered on every available surface. One day the things… they start making their way toward one another as if by some poetic pull. At the top of the post, an Afghani coin finding with brilliant emerald glass, a gear with verdigris patina, an ancient crystal bead and a piece of industrial trash. Above, a newer finding paired with a Mexican milagro.

wippairing1

More Kuchi coins above (these are used in traditional costume including belly dance) with lovely glass rubies, being riveted to a pair of seriously rusted bottle caps scavenged from some American desert. Fiber may be added at some point.

wippairings3

How do these tiny objects — a old discarded button, an African Vaseline trade bead, a bumpy middle Eastern bead, a tiny verdigris sparrow — come together? Some ways might be: color, form, content, texture, juxtoposition of cultures and histories. Things that resonate as similar or opposite, or both. The rule of chance encounters. The joy for me is that I don’t think much about any of this.

wippairings4

Part of it is the trained eye, the practiced hand, designing for years, decades, a lifetime. Part of it might be something inaccessible; dreams, associations. Above, an ancient glass button, possibly 1920’s, likely European, paired with a Mexican heart milagro charm. A tiny visual poem begun, beauty, an adornment.

Charming Shadowbox

A comment from the mom of the baby whose bracelet is pictured in the below post mentioned that she was considering making a shadowbox to contain the bracelet for display during the years prior to her daughter being able to wear it.

This jogged my memory of creating just such a box when I designed a wedding gift charm bracelet for a friend who I wasn’t sure would be able to wear the chunky bangly thing too often… but might want to display it in her home rather than keeping it in a jewelry box hidden away.

The photos aren’t great, but I hope you get the idea. The raw pine box was purchased inexpensively at Michael’s crafts store and has a glass front door. I stained the box and lined it with pretty craft papers, including a scrap from the actual printed wedding invite, installing two small nails on the back wall for hanging the bracelet.

I then added a few treasures to the bottom floor of the box, a miniature cake and some dried rose petals. I honestly can’t remember if I ever resolved creating a way to hang the box on a wall, or if I just left it as something to display on a shelf or tabletop (probably the latter). I had a moment’s thought to offer these custom boxes for sale along with my charm bracelets, but ultimately decided that the amount of work involved was just beyond what I could probably charge. It isn’t hard, and you CAN do it yourself! If you have any questions or want support with your own shadowbox project, drop me an email any old time! xoxo

Charming Charminess

Those of you who’ve known me for awhile might remember that my little jewelry business, So Charmed, began in 2001 as a small Web site selling themed charm bracelets with titles like Alien Abduction, Mod Squad, and Tutti Frutti. There were Alice in Wonderland bracelets and darker gothy pieces. Shortly after, I began designing custom charm bracelets for clients the world over… from the US to the UK, from Lebanon to Paris. Lots and lots of charm bracelets, each with a highly personal story to tell. And then… I took a break from charm bracelets.

When Margie’s family got in touch recently to request a gift bracelet, I couldn’t say no. Pictured at the top of the post, with additional detailed shots, the process, result, and exclamations of joy from Margie reminded me fully why I LOVE LOVE LOVE creating these magical little heirlooms.

Margie’s bracelet is sweet-with-a-bite, titled: Smitten, Bitten, and a Kitten. It includes the articulated fangs shown above and loads of vintage beads in dusky candy colors. After doing dozens, possibly hundreds of these, I can tell you, the endless nature of how they turn out never ceases to amaze me. And I’d really like to start offering them again on my site!

Above is Margie’s daughter Abby’s bracelet… a long ago creation. Completely coincidentally, I chose the SAME kitty bead for Mom’s bracelet! Everything is up for grabs on these pieces… thematically, stylistically, color, charm selections. Materials are all sterling… sometimes with pewter charms used to keep costs lower.

Above is the add-a-charm bracelet designed for a one-year-old who is very special to me and my family. I left the bracelet blank enough to receive goodies annually. Please note, the bracelets are NOT appropriate for children or even super-active teens. They do have a certain inherent fragility, and should be handled with some care. Charms can be soldered in place for added security, this adds greatly to cost though. This and other childhood pieces are curated for presentation at a much later date.

One of the most elaborate bracelets I ever created was Wendy’s, pictured above. This one includes many custom resin charms, which are not at this time being offered. Still available though are an endless variety of gorgeous sterling and enameled charms, food charms, vintage charms, even a Tiffany’s gift box charm. The sky really is the limit.

Custom charm bracelets start at $400 + insured priority shipping; this covers my time and the basic supplies with pewter charms. Most of the pieces cost $450-600, with some going much higher. What drives the cost higher?Sterling/enameled and other specialty charms, vintage rare charms, and soldering (+$20 ea charm). The best approach is for YOU to decide your budget or range, and then I will work within that. Intrigued? Get in touch! And stay tuned for a section on the site offering these lovelies once again.

PS: No, I probably can’t get one done by xmas. In the past though, holiday recipients have been gifted with cards telling them that something verrrry special is being custom-designed and made for them. Trust me, no one has been disappointed to date!

Atelier Charm

Anyone who sews understands the frustrations of having to haul your machine onto the dining room table, make a huge mess, run upstairs to where the ironing board lives, clean everything up for dinner, and begin again. Agonizing, especially during an intense time of creating. Here are photos of my newly created nook. Above, among other things, you can see the little Indian dress which I am in the process of altering to fit… and it’s coming out GREAT!

It’s taken nearly a decade of living in my little house to figure out that I had the space and even the furnishings I needed to work this out in a far more satisfying and workable way. Above you can see that I used free weights against the folding table legs to help fortify it. I’d still like to find a sturdier table at the thrift sometime.

Top floor of the house is basically one master bedroom suite, outside of which is a lovely hallway / anteroom that is actually big enough for a small sewing elf such as me to feel cozy working in. Above you can see my grandfather’s desk, a beautiful old thing I’ve had in my life for over 30 years now. I remember him using it… a small round silver dispenser of stamps and a little dish with a wet sponge for applying the postage. There were always other fascinating things to look at in the desk cubbies.

To the left of this image is the doorway to the bedroom, a very large and quite gorgeous room that was expanded by the previous owner. My dressmaker dummy is in that room and the ironing board sets up easily there.

This is the other end of the hallway, if you spin around you’re at the stairway leading down to the main floor. I dearly love all of my old hat boxes, suitcases and my dolly pram full of vintage hats, which was thrifted for about $10. Major score. All images can be seen at full size over on flickr in the aptly titled set “house.”

Wild Thangs

Seems I’ve been in a wild animalia mode creatively this past week or two. Above is a necklace I designed and made this week. The bones are found (West Coast, USA), mostly deer. There is one other necklace in progress, I’ll share soon.

The piece is titled Come Here Little Dreamer and also features sweet vintage glass beads including rare African trade (vaseline), Indonesian glass, and native American glass crow beads. This necklace both scares and delights me and currently resides in my own collection.

Here is another completed garment. This is a thrifted 80’s wild thang party dress ($3) recon for the end of the world. It had coffee stains on the zebra-print fabric and when my vintage consignment shop rejected it I brought it home and decided to have at it. I’m really glad they didn’t take it!

The back is super cool, even the zipper got hit with the neon spray paint. I cut off a pair of very long sleeves that will be useful elsewhere, removed some ginormous shoulder pads, as well as several layers of zebra floof.

I also turned the lining to the outside around the neck b/c it was so pretty in that deconstructed way. Removed/replaced a big matchy rhinestone-encrusted zebra bow which will undoubtedly show up elsewhere.

The color is otherworldly. The neon green/yellow fabric glows as if lit from within.

Close up of the “confetti” treatment. I just sewed randomly with contrasting thread and stopped every so often to place a tiny scrap of the neon fabric, then sewing over it. I love this effect as it’s both purposeful and random.

This is the garment that inspired the confetti idea. On this lovely piece, the lace bits are just barely tacked down by a row of machine stitches and since they are larger, they flutter some. A very fun idea.

Head over to flickr if you want to see these images larger. Clothing is always listed in the horrifically titled Misc Stuff I’ve Made set.

What $17 + a 25% Off Discount Card Will Get You on Thursday at Value Village Thriftstore

I thrift in two ways. One is that I think VERY specifically about what I’m looking for (usually project related, sometimes just a fashion issue) and it is frightening how often I find exactly that thing. The other is just a random trip for the inspiring thrill of the hunt. 50/50 success rate.

Yesterday I went to score cheap old tshirts to make another dress. Didn’t happen due to an overwhelming number of ridiculously gorgeous textiles lurking about. Top of the post, the whole score. Above, a set of pillowcases (India) with amazing mirrored handwork on both sides of each, total of FOUR panels. Katie, Bethy, Dorie… one each for you local craftistas.

This blanket (India) is the most amazing shade of yellow-maize with faux fur and sequiny embroidery. Anthropologie eat your effing heart out. Wish I had skills to make a coat, but I’m going to do a skirt. Seems weird, hopefully will work. There’s lots of yardage.

Above, The Gettysburg Address, in its entirety, printed on a scratchy burlap tea-towel sorta thing. LOVE this typography and can’t wait to use patches of it on garments.

Have to research if it’s an image of Abe’s handwriting (as I suspect). I thought the Lincoln portrait was a bit tacky, but it’s grown on me and might get incorporated somewhere.

Warning: This one’s gonna make you swoon.

This vintage Indian garment fits me, but is a bit shapeless. I do not have it in me to cut this; yes I have boundaries. So, if I can’t easily alter it into a flattering shape by taking in the side seams, it will just hang on my wall. Isn’t it divine????

The back, though plainer, is also lovely, with rainbow thread embroidery on this incredible gauzy layered base fabric. This piece was $5, less 25% but is priceless.

There are often great curtains, linens, and doilies but I try not to over-collect hoard them. You might hear me muttering: Someone else’s treasure… my anti-hoarding mantra. At $1.49, could not pass these up. BTW, the one at the bottom is a “pineapple” pattern. Sweet!

My Companions

I can’t be the only designer/maker person in the world who has a love affair going with her tools. I’ve blogged about some very old tools used in my practice as a designer; here are a few pix of fave stitchery tools.

A very unsexy photo of one of my favorite aspects of my babylock sewing machine… the little hidden toolbox. Look at how perfect it is! The tiny compartments holding bobbins, a seam ripper, an extra foot. I find this so charming, esp. b/c the machine is pretty high tech, an embroidering computer really.

And of course this dear thing always comforts. It morphs from holding pins to holding buttons, fabric scraps, ribbons… any old thing. These tomato pin cushions have been around for so long they always make me think of my grandmothers and of carrying on stitchy traditions in spite of modern technologies.

I know you people love your scissors like I do! Above, my super sharp and pointy little snips for thread and detail work. Below, the big mama sheers which came nestled in a beautiful velvet lined gift box/coffin. Both purchased a few years ago, I might never have bothered except for the incredible gothy typeface of the company name–Gingher— etched on the scissors and tin.

And, below (as well as detailed at top of post) my dear tiny screwdriver, the perfect size for the screw that unlocks the machine’s needles. I have had this thing forEVER and have no idea where it came from. I have always loved the deco styling, the cherry red handle and the little golden bakelite piece but it was just today that I noticed the tiny white type reads: COMPANION. Yep!

What’s your favorite tool?

Mad Stitchy World + Iggy

A crazy stitchy day yesterday, several things going at once including this little tshirt remake dress.

Big breakthroughs in stitching tshirt fabric: 1. Buy JERSEY needles for your machine. Life-altering and about $3. 2. Zig-zag keeps the fabric stretchy, and it works to set your stitches wide and flat.

To make the top, just find a tshirt that you like (this one is a thrifted Volcom, I like their graphics!) and that fits your chest and cut it into whatever shape suits you. I tend to like no sleeves (cap sleeves could be cute too), a wider neckline and back to bare my tatt, and a higher waist. I do this freehand, but you can also use a favorite tank as your “pattern.” Don’t fear the scissors!

We interrupt this sewing for a kitty break. Napping kitties are irresistible, don’t you think?

Big fierce yawn!

Fully awake, ready for snacks. Or to sit on fabric laid out on floor for cutting.

Here is another in-progress thing, a dress, but I’m not sure how it’s going to be finished. I want it to be extremely plain, sort of prairie/nun-like. So I may end up not using the pretty vintage doilies (a whole set, thrifted for a couple of bucks).

Definitely will use the Victorian scrap pictured at the top of above shot. It’s really lovely.

The pieced part will be the main dress, the fabric is sheer and super stiff, like voile.

Here’s the finished Desert Babydoll dress, which needed… something… and got a flaming heart treatment + gold spray-painted big safety pin.

I just love how this piece looks with my tassel necklace.

Close up of the velvet heart (it’s a pocket!). The shimmery turquoise fabric is INSANE, and was scored at ScrapDC during one of their fill-a-bag sales.

All photos can be seen at full size over on flickr.

Colors for a New Dystopia

The first rule of Fight Club is to watch Fight Club at least once every few years in order to go crazy over the sets and costumes, most especially HBC who is one of my always and forever fashion icons. The styling in Fight Club launched a million dystopian thriftstore wardrobes and wannabe revolutionary soap-makers among other things. Oh, and kids, smoking is not cool, ok?

So here’s some stitchery completed over the weekend. I’ve always wanted bits of neon in my dystopian costumery, and sparkly flotsam/jetsam of the post apocalyptic world.

Above pictured mermaid Mad Men remake is the work of Mo Lappin at Howlpop, a scissor sister whose work I’ve been collecting for awhile now and who inspires endlessly. Her freedom to slash, burn, and collage celebrates the punk aesthetics of chaos, mistake, and chance. The red velvet bag is my creation.

The dress was not a perfect fit for me, so I decided to revise, knowing Mo would be cool with my collaboration. Thus, the back zip was removed, the dress opened up to a slightly more swingy and less wiggle-tight, can’t-sit-down style. Altho the decisions seem random, I worked to integrate my changes front and back. Hello matte black spray paint.

This tunic length top began life as a happy/dressy little number, and was quite lovely as-is, though missing enough sequins to eliminate the possibility of wearing to any real-life high-end affair (as if I go to any of those). I knew when I thrifted it for 4 bucks that it was destined for an attack of some kind.

It’s hard to capture these garments in photos and without being body-worn; they fit gorgeously since I drape/pin them on my antique dressform and on my own (antique?) body. The colors in this one are just off the hook; colors that seriously may not have existed until right now. While it can be difficult to get used to chopping into, stitching onto, and spray-painting a garment that you know was once extremely expensive… that’s really the exhilaration of it all. Trust me.

I love the juxtaposition of neon polyester sports fabric with all these dressy sequins. A perfect downgrade to a more plebe use of this rejected little number. Maybe she once attended a swank DC ball, something I’d never be invited to. Ha, and look at her now, ready to tromp through the post apocalyptic wasteland. With ancient Afghani beaded tassel necklace, likely once worn by a camel. Because yo, the apocalypse WILL have a desert theme, right?

A hideous camisole meets a nasty discarded curtain swag in this little flirty desert-punk babydoll dress. Another Afghani tassel necklace, the beadwork on this discarded item literally breaks my heart.

From the back, the garment includes an ancient piece of Victorian lace, avec neon spray paint. Held my breath and cut loose with the can. Was it the fumes or the act that made my heart race? This one is still in progress, needs hand-stitchery.

Loving the sick juxtaposition of trashy crap manufactured lace with insanely gorgeous handmade heirloom lace. In yer face.

And again, previously non-existent colors. I kid you not. The thrills just keep on coming.

This is the most elaborate piece in the collection. Started many months ago and threatening to be sadly overworked, with weeks of distance I was able to edit out the nonsense and get it to its essence. This is a burlesque-y top, short in the front with full-on neon bustle out the back for a big booty shake. The embroidery references a cosmological event, SW 1644+57 that you want to check out. We’re talking a black hole that ate a star and then blasted a 3.8 billion light-year beam at the Earth. Yeah, freaks, that’s what I’m talking about.

BTW, this started life as the ugliest plaid “work” dress of your worst office nightmares. Unwearable by any standards. This is actually the lining of the piece, over which a shapeless sheath hung like a limp feedsack in jaunty tartan. Why hide all that body-hugging sex appeal under a plaid workaday burka? This is a question you’ll have to answer for yourself. Oh wait, I just did.

The second rule of Fight Club? Don’t talk about Fight Club. But you knew that.

Full sized photos here.

Curiouser & Curiouser, Through June 15

My exhibit entitled Curiouser & Curiouser, sponsored by Takoma Park Arts & Humanities, runs through June 15.

There are four large glass cases filled with everything from jewelry, to textile work, to clothing explorations. Hard to photograph through the glass… but I hope you get the idea.

7500 Maple Avenue, Takoma Park, MD, 20912. Also please visit the senior show of the Einstein High School arts magnet program in the Atrium Gallery.

Some of the work is for sale at So Charmed, other pieces are from my personal collection. If you visit, send an email inquiry regarding purchase.

We forgot to get photos of the petite artiste herself (resplendent in a PUT A BIRD ON IT taxidermy-festooned vintage 1930’s hat that Isabella Blow is coveting from fashionista heaven), but never fear. Yours truly was interviewed by a nice young man from Takoma Cable Television! Not sure when that will be available for local viewing. And available, and available… I’m sure this will be at least partially, if not fully mortifying.

Big loving thanks to friends and family who came by for the opening and a special huge hug to Molly for her amazing skills at setting up the cases while Mom was just pretty much freaking out.

Surrealism, Africa, Holland, and Me

I’ve been making a lot of dresses based on the Piece of Cake frock pattern by Jody Pearl of Sew Outside the Lines and when the above pictured African wax print textile (lower fabric) arrived at my attelier (purchased here) , I decided to make something in a queenly maxi length. I also became utterly obsessed with this gorgeous fabric, searching high and low for info about it. Is it genuine wax print or fake? Most importantly, what ARE those strange objects and why do I find them so impossibly alluring?

My research deadended and I sort of gave up, and then, while searching for more textiles on Etsy, I came upon the above (purchased here). Uhhhh, wait a minute! That’s MY textile. And I like it even better in this crazy colorway! I immediately contacted the lovely seller, Angela, who came forth with loads of info about the The Gallery of Poems textile collection from Vlisco, renowned Dutch (not African) textile manufacturer.

Here is Vlisco’s description of their 2011 Collection: GALLERY OF POEMS: DRAMATIC ROMANTICISM

Once upon a time, Vlisco created a mysterious new fabric collection called ‘Gallery of Poems’. Dreams wander, floating into your own fairyland. Step into a new world and view the designs as objects of inspiration. Some designs will magically transform into a piece of art, adding a romantic touch to the poetic drama, while others illustrate a surrealistic passing of time. The decorative collection is intensified by a flamboyant colour palette. ‘Gallery of Poems’ makes you feel like a fairytale beauty.

This is where I about fell on the floor. Surrealism? Although this is another story for another time, suffice to say that at age 14 I came under the influence of members of the American Surrealist Movement (one of whom remains one of my oldest friends), and my life at that point was forever changed. Thus, it seemed that my locating this textile, and the subsequent journey into the world of high-fashion African wax prints, was deeply connected to other aspects of my life as an artist.

Of course, me being me, it doesn’t end there. The above video from Vlisco is absolutely fascinating, explaining the wax print process (pattern ends up on BOTH sides of the cloth) and a lot about the history of the company. These fabrics are so incredible, words can not express. Vibrant color, a slightly stiff substantial hand, and beyond gorgeously weird concepts that combine traditional African imagery with modern Western icons in a global village collision that makes my head spin. Pricing aligns with the incredibleness… yardage is sold only x6 yards and at $15 per, + shipping from the UK… OMG. Here’s your source; Vogue Fabrics UK.

I’m obsessing over the four textiles shown here.

Know someone who might want to share yardage? Put them in touch, ASAP!

Because I….

…want to make more dresses!

PS: Added bonus video; How to tie tradtional African Gele (head wrap):

Fabric, Part 2: Spoonflower!

Those of you who follow my ramblings on Facebook and my pins on Pinterest, know that I’ve taken a sewing detour of late and have been making the prettiest little dresses using Jody Pearl’s Piece of Cake frock and tunic pattern. Pictured above is my favorite cake to-date worn by me, and featuring a crushed velvet top and yardsale damask (art deco) skirt. Not to mention vintage French faux-fur trim… it is quite the confection! You can see the rest of the cakes in progress and finished/worn over on flickr.

Meanwhile, I spend an inordinate amount of time scouring the world (real life AND virtual) for textiles; a recent post highlighted an obsession with Japanese prints and I’ve been haunting my local thrifts for curtains and bedspreads! This post will highlight fabrics found on Spoonflower; an incredible web site that allows anyone to design and upload/sell their own textiles. And there is truly GORGEOUS stuff to be had.

One of the coolest things about the cake dresses is pairing the fabrics so I’m going to upload these images in order of possible pairings. I love odd color combos and on Spoonflower I seem to fall in love with some very macabre, outre textiles!

First pairing of flies and skulls. Second is a pair by the same artist and I actually like the similarity of color with the difference in imagery… busses and telephone wires.

Above, an odd rococo pairing with squids ‘n roses (like guns ‘n roses only better)! Apologies for not linking all the swatches, they are easy to find by searching Spoonflower and ARE linked over on my Pinterest Craft Board.

Cities (Tokyo) and wolves… I LOVE this pair.

Bones! Scary Forests! The mind reels with possibility. Spoonflower, btw, is print on demand. They offer eight fabric choices and you can obtain a swatchbook for just a dollar, which I’ve done. The fabrics are pricey (but I think it’s worth it to support the designers), starting at $16.20 per yard for quilting weight Kona cotton and going up to $34.20 per yard for silk crepe de chine, which I will NOT be ordering. For the cake dresses I recommend either the Kona, or (and especially) the linen-cotton blend which will be similar to the Japanese fabrics I’ve used and work really well to hold pleats, giving the frock nice fit/form.

WIP: Piece of Cake Dress

A few weeks ago I posted about a terrific pattern I’d discovered; a dress called the Piece of Cake (by Jody Pearl of Sew Outside the Lines). Pictured above is my dress in progress!

The hardest part of this (I think) is the slight altering to the pattern that I worked through this week. I went between sizes for the top, and opened the front neck and arm holes a little. Super easy, really.

You may remember my excitement over Japanese fabrics I’d located on etsy, and yes, I did end up ordering some. However, for this first dress, I don’t want to start cutting into $18 per yard (GASP) linen, hence the above pictured mid-century table cloth I dug out of my dining room sideboard. It’s really lovely! And I was able to avoid the holes! The top fabric looks mid-century, but I’m not sure; it may be reproduction. It was a pair of pajama bottoms — already cut up a bit — scored at a yard sale.

I’m going out to buy seam binding tape (any ideas for color??) and if you missed by facebook post on how to sew seam binding, here is a terrific and very funny video on the subject:

This is truly just so exciting and fun. I am enjoying it immensely and finding that I mostly do have the patience to do things slowly and with care. Sewing commences this weekend… wish me luck!

CORSET TUTORIAL: Steal this Idea… I Did!

If you love corsets but find them awfully expensive, here’s a great simple corset you can make yourself. With NO sewing! I saw it in a shop window here in Takoma Park and immediately thought: I can do that!

The most challenging part of this project is locating the vintage army surplus spats you’ll need. The ones I used are from WWI and were scored on Etsy for about $20. I’ve seen them on ebay as well, sometimes as much as $40-$45… still not prohibitive and lots less than a corset which will run you hundreds (not that I would know :).

Step 1: Acquire a single pair of spats. Step 2: Lace them up. You have just made a gorgeous steampunky corset. 

A note about fit… the spats tend to be small through the curvy waist part. My teenage daughter can fit into this with the front nearly laced closed, and she’s a skinny minnie, size 0-2. On me (30 waist, size 6), the front is pretty open. I was dubious about the cloth fabric laces in the front… but it turns out that it really works if you’re going to wear it more open, as it forms sort of a “panel” in the front (as shown in middle photo). And I do like the girly color with the manly spats. So, I think 30-31 waist might be the maximum for a single pair of spats/corset. HOWEVER, there’s nothing that says you can’t add another pair, lacing up the sides… right?

Oh, and that furry neck thing in the top photo is a collar I knitted. Another no-brainer of a project for the craft inspired-yet-impatient/challenged!

WIP: More Soldered Focals

Having some fun with solder again today. These necklace focals are both made with thin sheets of micro glass, between which stuff is sandwiched, then soldered.

This is particularly fun, because you can see the lace from the other side of the charm. I used two little claw-foot findings to make loops for stringing chain. They were a beeeyatch to solder… I need one of those third hand thingees before I burn the bejeebus outta myself. The lace is tea stained and the flower is millinery, both very vintage.

This image shows you the flip side of the scissor charm. These are vintage tobacco tags from India, with the coolest graphics. I used a filigree broken in half for the top… one piece soldered to each side. Crafty!

WIP: New focals

I’m so excited to share this with you… a new necklace focal — printed images soldered between thin pieces of glass. Above is one side, below is the other. I added the little fleur de lis charm for fun and patina and sanded everything to a messy aged black.

Since giving up the resin process, I’ve been agonizing over not being able to play with text and images. Having had this entire soldering kit around the studio for several years, and having experimented with it a bit lately, I finally got inspired to go the full distance creating one of these sorts of picture things. The technique is nothing new. But I hope I’ll be bringing that So Charmed touch to the whole thing.

And here are some CRAZY tribal focals made with clay (polymer), wire, and dental teeth, which I believe are porcelain, but not sure. They didn’t melt in the oven… so I’m assuming they aren’t plastic! I have a few cards of these… they are used (I believe) for shade matching.

I have to say, these scare even me. They are so incredibly creepy. But I do love them and can’t wait use them in jewelry. Big hugs to Steph of Vladthebatsattic and Simona of HappyFallout for the clay inspiration. Visit their shops to see really great stuff made with actual fired clay… much better than my efforts!

Here’s the second Marie focal, with a vintage brass ribbon thingee soldered on. This is LOTS OF FUN to do.

The back of this second charm features an ancient guillotine illustration. Had to go there…

Japanese Fabric Eye Candy

Since deciding to make a little dress (see previous post) I’ve been exploring the vast world of imported Japanese fabric on Etsy.

There are several shops that have hundreds of listings of these gorgeous prints in cotton and cotton-linen blends.

The rest of this post will be sans text eye-candy. Oh, be warned: some of the fabrics are ghastly expensive. But I’ve really never seen anything like it.

Sew Outside the Lines

I stumbled upon the work of Jody Pearl (I know,  soul sister in name right?), over on flickr, where she posts lots of great images including a recent self portrait with flaming pink hair (I know, hair sister too!)…


Turns out Jody — who goes by Reinventing Fashion (soul sister of craft!) — has a full-on web site where she sells her wonderful patterns, fabrics, and trims. I fell in love with the Piece of Cake dress, pictured in this post, and emailed her to ask  just how piece-of-cakey it might be for a fledgling sewist such as yours truly.

My guess is that regardless of the answer to my question, I’ll be giving this a try… it’s just TOO tempting. Visions of thrifted and vintage fabrics dance in my head, along with an entire wardrobe of funky, handmade tunic tops to wear with leggings and skinny jeans. Anybody want to mentor me on this (you know who you are…)? Here’s a link to the pattern, but don’t miss these pattern packages which also include some of her lovely fabrics.